How to create and configure a MIDI track in Pro Tools
This blog is part of our new series of tutorials based on Avid’s flagship Digital Audio Workstation, Pro Tools. On the following tutorials, we’ll cover the basic track types included in Pro Tools.
Want to learn how to use Avid Pro Tools in real time, with a professional digital audio trainer? It’s faster than blogs, videos, or tutorials. Call OBEDIA for one on one training for Avid Pro Tools and all digital audio hardware and software. Mention this blog to get 15 bonus minutes with your signup! Call 615-933-6775 and dial 1, or visit our website to get started.
Need a Pro Audio laptop or Desktop PC to run Avid Pro Tools software and all of its features at its best?
Check out our pro audio PCs at PCAudioLabs.
Table of Contents
Getting started with how to create and configure a MIDI track in Pro Tools
Once you start a new Pro Tools session, you will need to create tracks where audio, MIDI and video material will be recorded and/or played-back from.
Pro Tools presents several types of tracks that you can create and today we will focus on the MIDI Track.
MIDI tracks are used to record MIDI information that can later be used to trigger virtual instruments or hardware instruments such as synths and drum machines. MIDI tracks do not store audio information and do not reproduce audio signals. They only store MIDI information such as note value and velocity. This MIDI information is capable of triggering virtual instruments or hardware that will in fact output audio content.
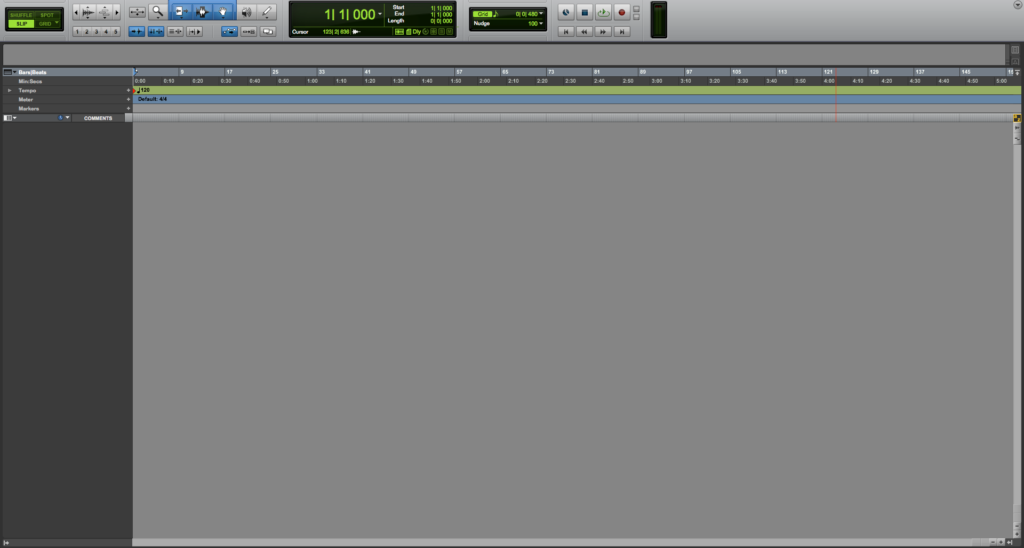
1. Create or open an existing Pro Tools session:
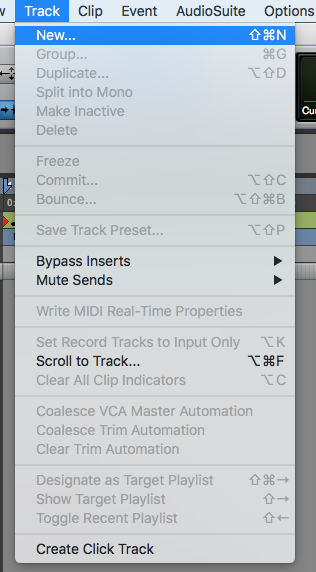
2. From the top menu click on: Track -> New:
The “New Tracks” window will open as:
The “New Tracks” window has the following options:
- Create: This field lets you type the amount of tracks that will be created.
- Channels: This drop-down list lets you choose between options such as mono, stereo, LCR, Quad, etc.
- Type: This drop-down list lets you choose between track types such as audio, MIDI, instrument, aux input, etc.
- Samples/Ticks: This drop-down list lets you choose between sample-based tracks and tick-based tracks.
- Name: This field lets you type the track name.
For the purpose of this tutorial we will create a MIDI track, that we can use to record MIDI information.
3. Apply the following configurations to your “New Tracks” window:
- Create: 1.
- Type: MIDI.
- Samples/Ticks: Ticks.
- Name: MIDI.
4. Press “Create”:
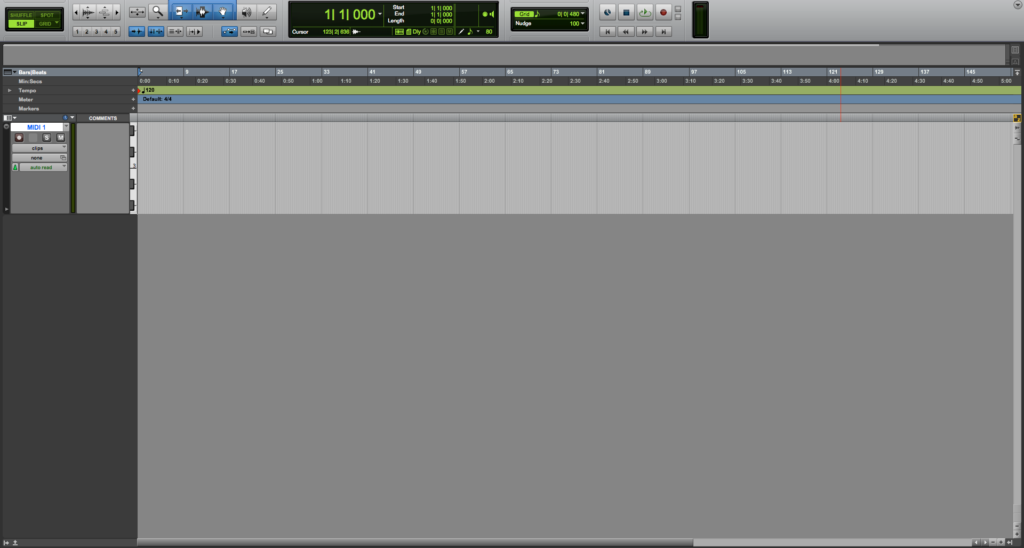
The MIDI track will be created as:
Now we must configure the inputs of the MIDI track.
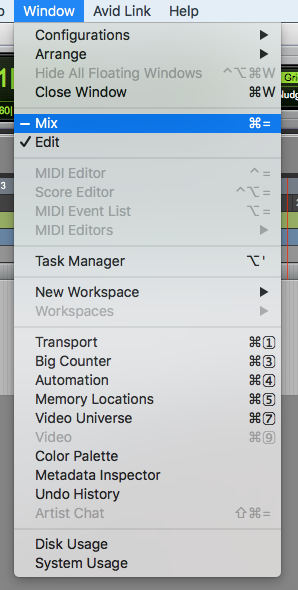
5. Open the mix window by clicking on the top menu bar: Window -> Mix
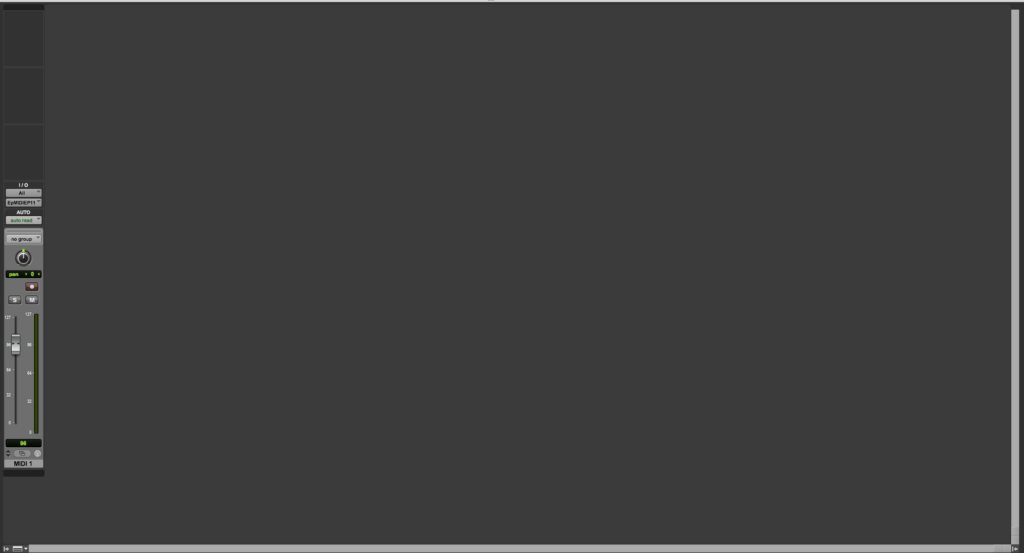
The mix window will open as:
Zooming into the inputs/outputs:
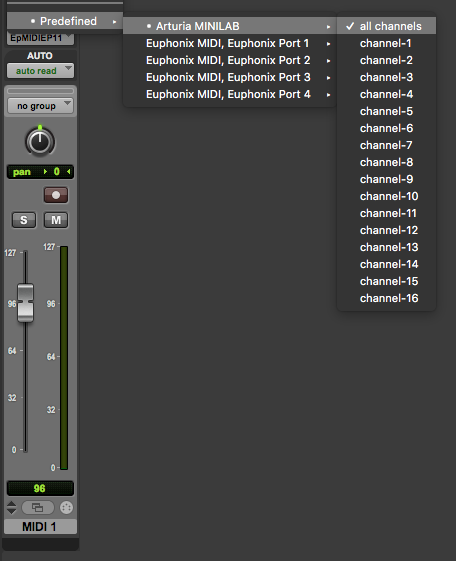
We can see the input is set to “ALL” meaning it will receive MIDI information from all MIDI devices connected. This might not be ideal, so we want to select the actual MIDI device that we will use. For the purpose of this tutorial we will select the Arturia MINILAB Keyboard on the “all channels” mode.
6. Set the INPUT of the MIDI track to the desired source.
After selecting it, the input will show as:
At this point, the input has been properly configured, if the user presses any key of the assigned ARTURIA keyboard, the MIDI signal will be shown on the MIDI scale.
We must now configure the output of the MIDI track.
As explained before, there are two options for the output:
- Triggering a hardware instrument
- Triggering a virtual instrument
In order to trigger a hardware instrument, the user must simply select the hardware instrument from the MIDI track’s output list. We will not demonstrate this on this tutorial.
Conversely, if the user wants to trigger a virtual instrument, the user can select it from the MIDI tracks output list.
In order to do this, the virtual instrument must be pre-inserted on an aux input before doing the routing.
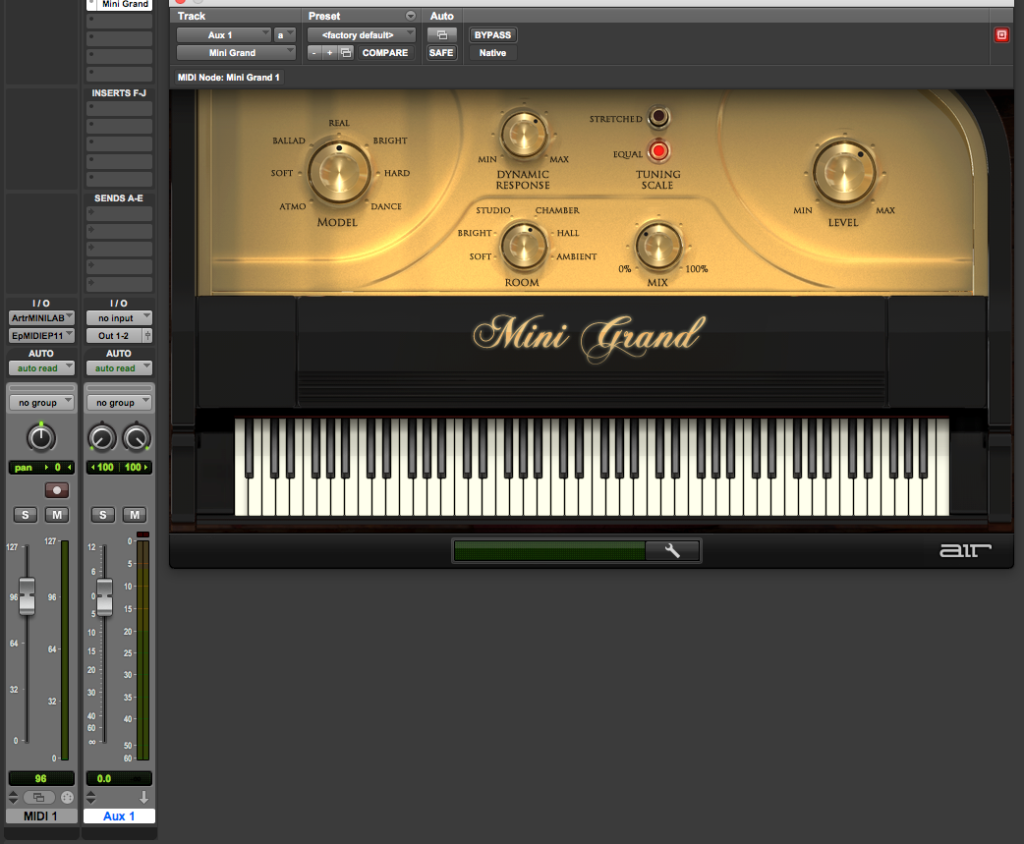
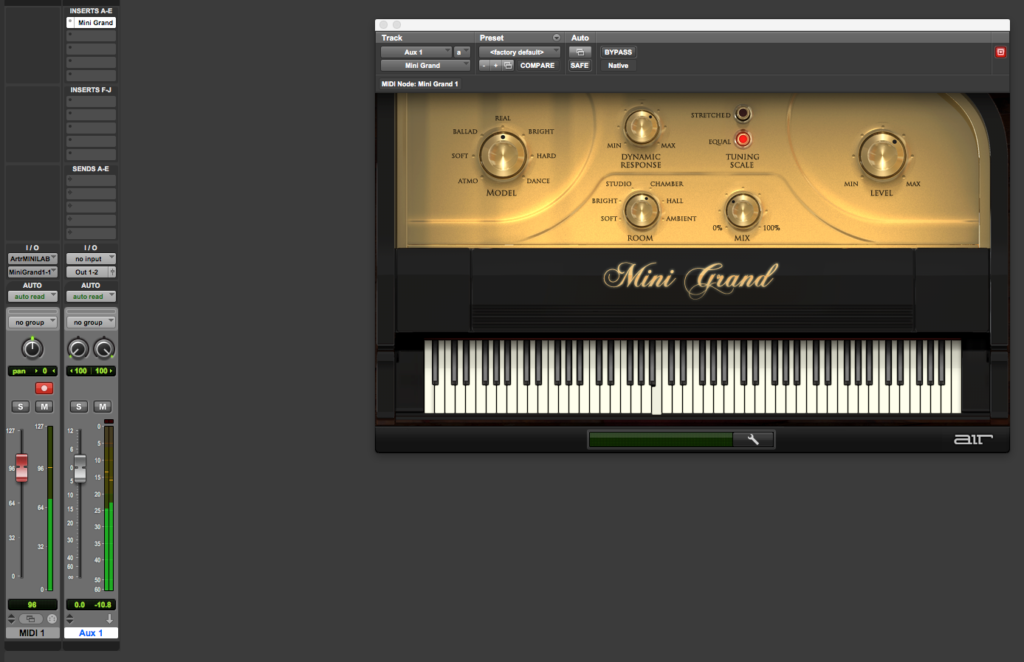
7. Create a new aux input and add a virtual instrument to it as an insert
For the purpose of this tutorial we will use Avid’s Mini Grand virtual instrument.
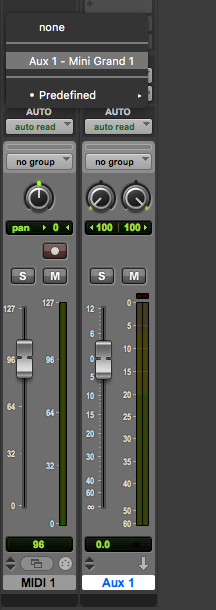
Now that the virtual instrument has been created, we can route the output of our MIDI track to the virtual instrument.
8. Set the OUTPUT of the MIDI track to the desired virtual instrument (Mini Grand):
After selecting this option, the track’s output will show as:
The user can now record enable the MIDI track and play the MIDI controller. The scale on the MIDI track will show a MIDI signal happening, but at the same time the aux input will show the audio coming out of the virtual instrument that is being triggered by the MIDI information!
At this point we have successfully created and configured a MIDI track in Pro Tools.
Using Avid Pro Tools software to produce music would be ideal with one of our professionally designed PCAudioLabs Systems due our high-performance specifications in order to work with any of the Digital Audio Workstations supported. If you would like to order one of our PCAudioLabs computers, please call us at 615-933-6775 or click this link for our website.

