Change MIDI Velocity in Pro Tools
This blog is part of our new series of tutorials based on Avid’s flagship Digital Audio Workstation, Pro Tools.
Want to learn how to use Avid Pro Tools in real time, with a professional digital audio trainer? It’s faster than blogs, videos, or tutorials. Call OBEDIA for one on one training for Avid Pro Tools and all digital audio hardware and software. Mention this blog to get 15 bonus minutes with your signup! Call 615-933-6775 and dial 1, or visit our website to get started.
Need a Pro Audio laptop or Desktop PC to run Avid Pro Tools software and all of its features at its best?
Check out our pro audio PCs at PCAudioLabs.
Getting started with how to Change MIDI Velocity in Pro Tools
Pro Tools is a software that lets you produce, record, edit and mix audio as well as MIDI performances.
If you are a musician or producer, you will benefit from recording MIDI performances that you can use to trigger your favorite Virtual Instruments in your songs.
When you record MIDI, the standard MIDI message records a MIDI note and its associated velocity. The velocity information tells the virtual instrument “how loud” the keys were pressed in order to trigger the proper samples.
Sometimes, we might encounter situations in which we either played “too hard” or “too soft” on some notes and we might need to address that in order to modify the velocity.
This can be done manually, note by note, or with a global method found on the Events Operations window.
On this tutorial, we will learn How to Change MIDI in Pro Tools using the Event Operations method:
-
Create or open an existing Pro Tools session:
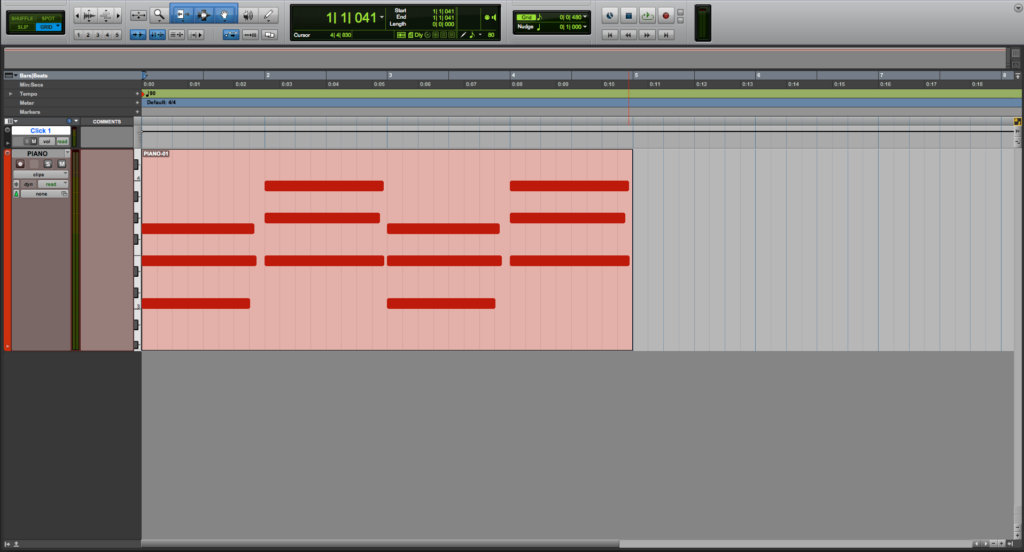
Make sure the Pro Tools session contains at least one track with MIDI information:
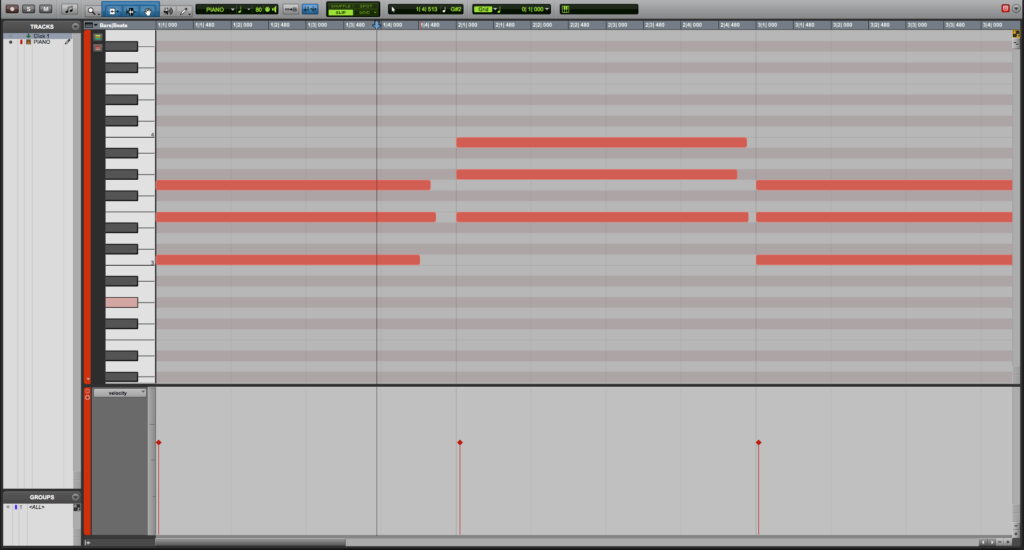
2. Double click on the MIDI clip to open the MIDI editor and see the MIDI information:
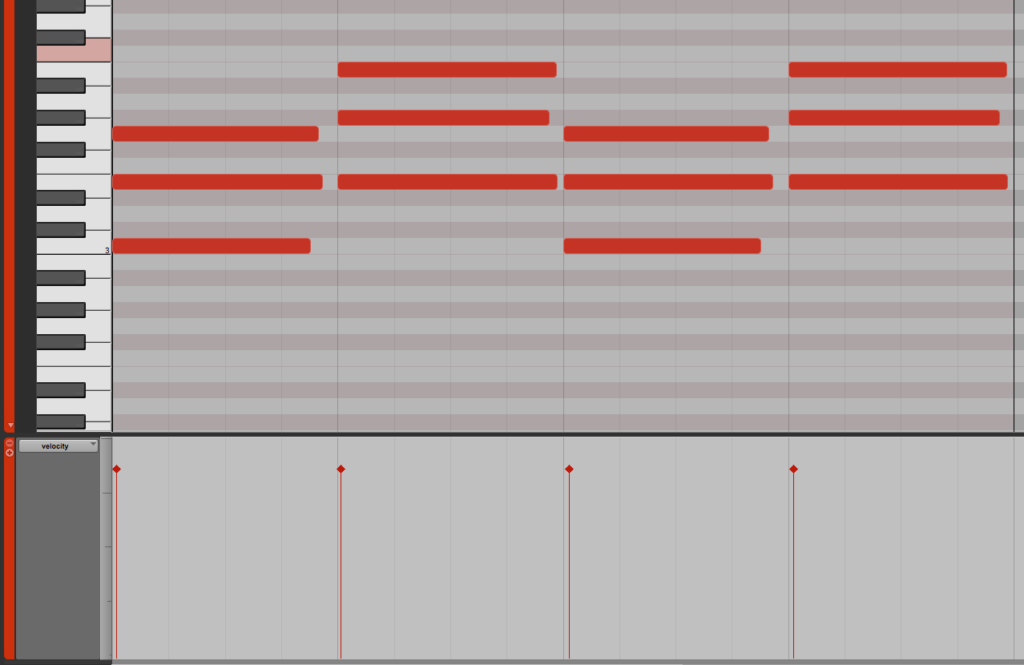
From the MIDI editor window, we can see there is a bottom tab that shows the velocities associated to each note played. These velocities are represented with vertical lines that go from values of 0 to 127.
On this tutorial, the velocities were recorded around 80.
Now, let’s say a velocity value of 80 was “too soft” and we want to increase all of them at the same time, to a value of 110 for example.
In this case, we will benefit from the Event Operations window and its “Change Velocity” function.
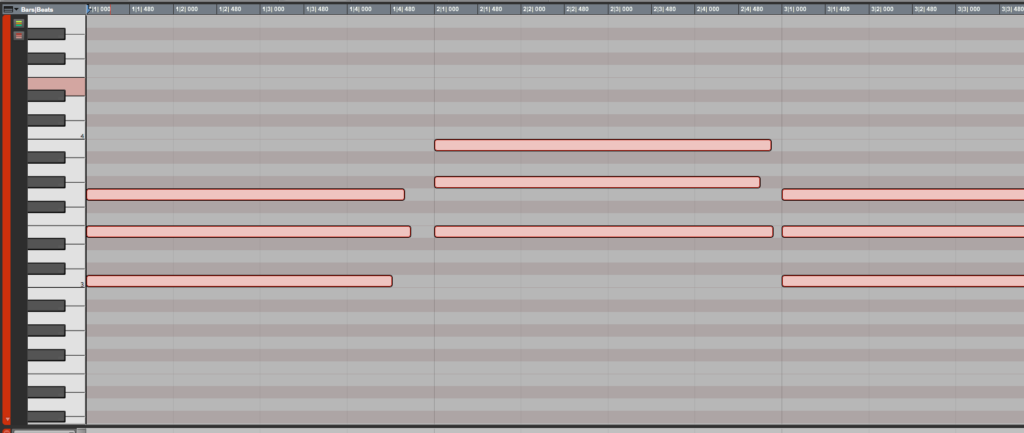
3. Click and drag over the MIDI notes to select them:
The notes will appear highlighted as:
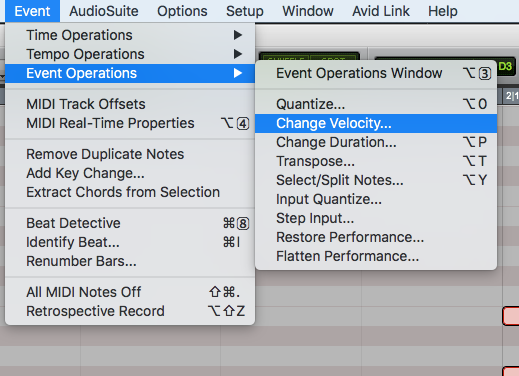
4. On the top menu bar, click on: Event -> Event Operations -> Change Velocity:
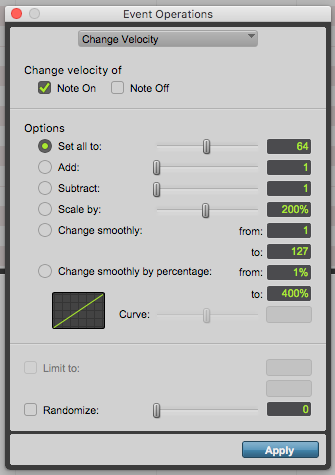
The event operations window will open as:
This screen has several parameters that we can describe as:
- Note On: When selected, the velocity change will be applied to the Note On message (how “hard” you play the keys).
- Note Off: When selected, the velocity change will be applied to the Note Off message (how “hard” you release the keys).
- Set All To: When selected, this functions sets all notes to a specific velocity value.
- Add: This function adds a certain velocity value to all velocities selected.
- Subtract: This function subtracts a certain velocity value to all velocities selected.
- Scale by: This function scales all velocities selected by a percentage.
- Change Smoothly: This function lets velocities to change smoothly from one value to the next one over time.
- Change smoothly by percentage: This function lets velocities to change smoothly from one percentage value to the next one over time.
- Limit To: When selected, this restricts the change velocity function to a minimum and maximum range.
- Randomize: When selected, the change velocity function is randomized by the specific percentage value after applied.
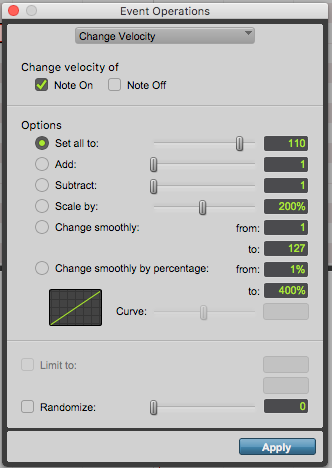
In the case of this tutorial, we will set all velocities to a value of 110 with no randomize option, therefore we must configure this window as:
- Note On: Enabed.
- Note Off: Disabled.
- Set All To: 100.
- Add: Disabled.
- Subtract: Disabled.
- Scale by: Disabled.
- Change Smoothly: Disabled.
- Change smoothly by percentage: Disabled.
- Limit To: Disabled.
- Randomize: Disabled.
5. Apply the previous configurations, the window should look like this:
6. Press “Apply” and the velocity change will be applied:
As we can see, all the notes had their velocities increased to 110. The vertical lines representing velocities are now “higher”.
Also, we note how the actual horizontal bars representing the notes on the piano roll, appear to be “darker” meaning the velocities are higher, therefore “louder”
The remaining parameters do not affect the procedure because they were disabled.
This is the simplest procedure you must follow in order to Change MIDI Velocity in Pro Tools.
At this point, we have successfully explained How to Change MIDI Velocity in Pro Tools.
Using Avid Pro Tools software to produce music would be ideal with one of our professionally designed PCAudioLabs Systems due our high-performance specifications in order to work with any of the Digital Audio Workstations supported. If you would like to order one of our PCAudioLabs computers, please call us at 615-933-6775 or click this link for our website.

