How to apply Crossfades in Pro Tools
This blog is part of our new series of tutorials based on Avid’s flagship Digital Audio Workstation, Pro Tools.
Want to learn how to use Avid Pro Tools in real time, with a professional digital audio trainer? It’s faster than blogs, videos, or tutorials. Call OBEDIA for one on one training for Avid Pro Tools and all digital audio hardware and software. Mention this blog to get 15 bonus minutes with your signup! Call 615-933-6775 and dial 1, or visit our website to get started.
Need a Pro Audio laptop or Desktop PC to run Avid Pro Tools software and all of its features at its best?
Check out our pro audio PCs at PCAudioLabs.
Getting started with how to apply Crossfades in Pro Tools
Pro Tools is a software that lets you produce, record, edit and mix audio as well as MIDI performances.
After you record your instruments and vocal lines, you might need to “compile” different parts from different takes into a master take.
When we start copying and pasting pieces of different clips and putting them together we might find parts in which audio discontinuities create artifacts such as clicks and pops.
These artifacts can be eliminated by applying crossfades between the clips.
Crossfades are non-destructive operations that you can apply between audio clips that overlap in order to progressively reducing the level of the first clip while raising the level of the second in order to create a smooth transition with no artifacts.
Today we will learn how to apply crossfades in Pro Tools.
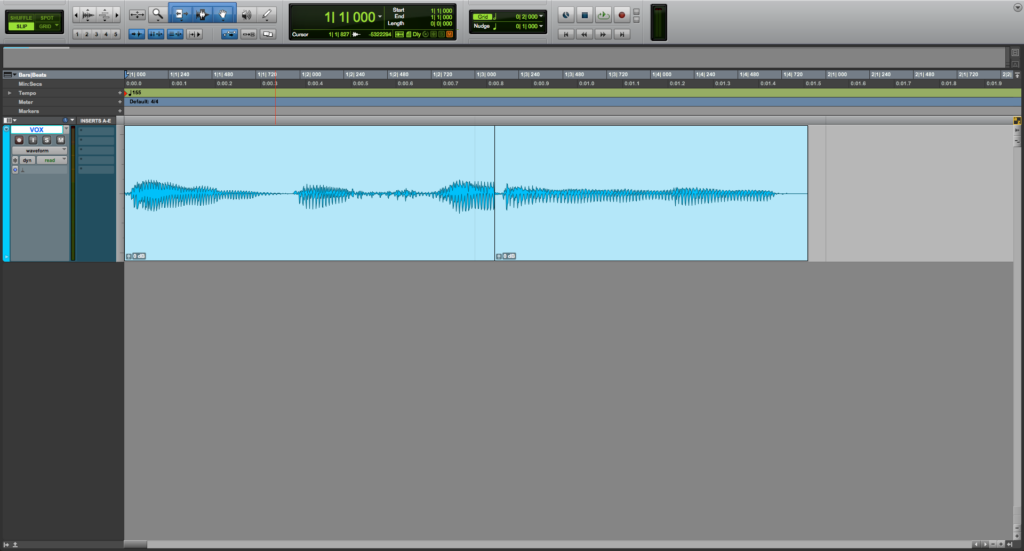
- Open or create a new Pro Tools session. Make sure it contains at least one audio track:
It is easy to see from the picture, we have an audio track that contains two audio clips that overlap. The discontinuity is obvious and the audio artifacts that come with it are very easy to hear.
We will “smooth” this raw transition using crossfades.
2. Make sure you have “SLIP” mode selected:
3. Zoom in even more on the start area of the transition between clips:
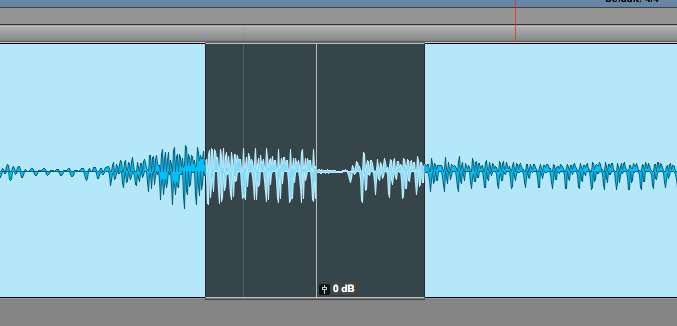
4. Click and drag over the transition area to select it.
It will appear highlighted as:
5. Press Command + F (Mac) or Control + F (Windows):
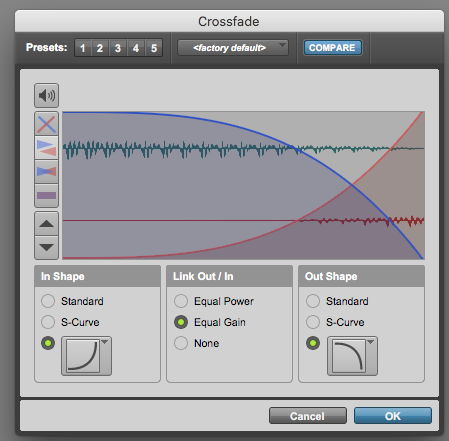
The Crossfade window will open as:
These window has certain parameters that can be explained as:
- In Shape: This part lets you select the shape of the in fade. Options include Standard, S-Curve and a list of other geometrical curves.
- Link Out/In: This part lets you select type of link Out/In. Options include equal power, equal gain, or none.
- Out Shape: This part lets you select the shape of the out fade. Options include Standard, S-Curve and a list of other geometrical curves.
For the purpose of this tutorial we will set this as:
- In Shape: Exponential In.
- Link Out/In: Equal Gain.
- Out Shape: Exponential Out.
6. Apply the previous configurations and the Crossfade window will look as:
7. Press “OK” and the crossfade will be created as:
You can now press play and the crossfade will smooth out the transition between clips. This way you will not feet any negative artifacts happening.
And that is it!
At this point, we have successfully explained how to apply Crossfades in Pro Tools.
Using Avid Pro Tools software to produce music would be ideal with one of our professionally designed PCAudioLabs Systems due our high-performance specifications in order to work with any of the Digital Audio Workstations supported. If you would like to order one of our PCAudioLabs computers, please call us at 615-933-6775 or click this link for our website.


