Customization Editor in Studio One 6
This blog is part of our new series of tutorials based on the new version of PreSonus Studio One 6, where we will be each of the new functions and features included.
Want to learn how to use PreSonus Studio One in real time, with a professional digital audio trainer? It’s faster than blogs, videos, or tutorials. Call OBEDIA for one on one training for PreSonus Studio One and all digital audio hardware and software. Mention this blog to get 15 bonus minutes with your signup! Visit our website to get started.
Need a Pro Audio laptop or Desktop PC to run PreSonus Studio One 6 software and all of its features at its best?
Check out our pro audio PCs at PCAudioLabs.
Customization Editor in Studio One 6
Have you ever felt like a certain section of Studio One shows too many options?
Perhaps you feel there are too many thing showing up that only end up cluttering your work?
Maybe you feel you want to show even more options at a certain part of the software?
Well, now in Studio One 6, you can totally customize what is shown in your Toolbar, Inspector, Transport and Browser. This is the new customization editor in PreSonus Studio One 6, and it lets you customize your PreSonus Studio One experience to its fullest!
So now, we will be able to assign only the functions we want to any of these parts of the program. This is a great way to get PreSonus Studio One configured to your exact specifications.
Let’s try it!
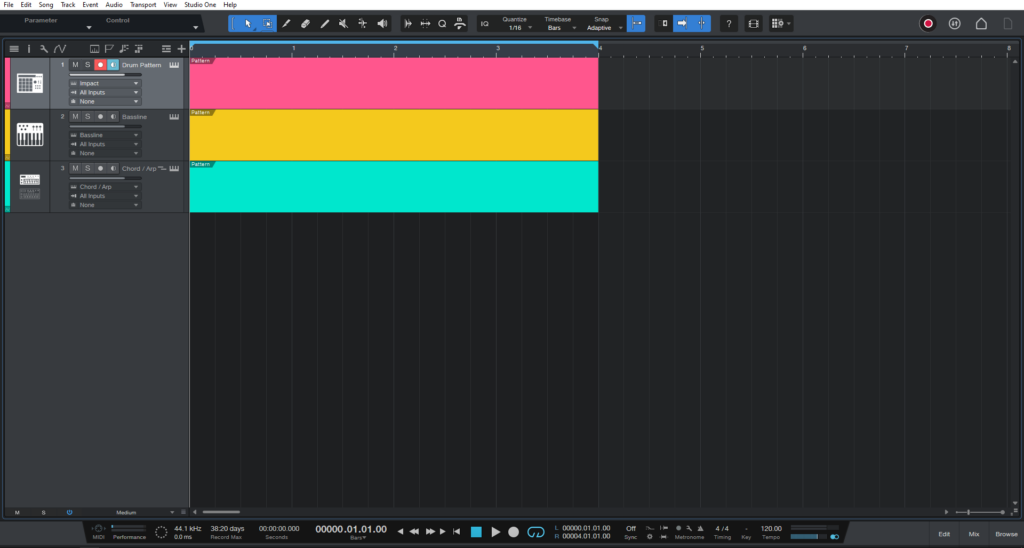
- Open your Studio One song:
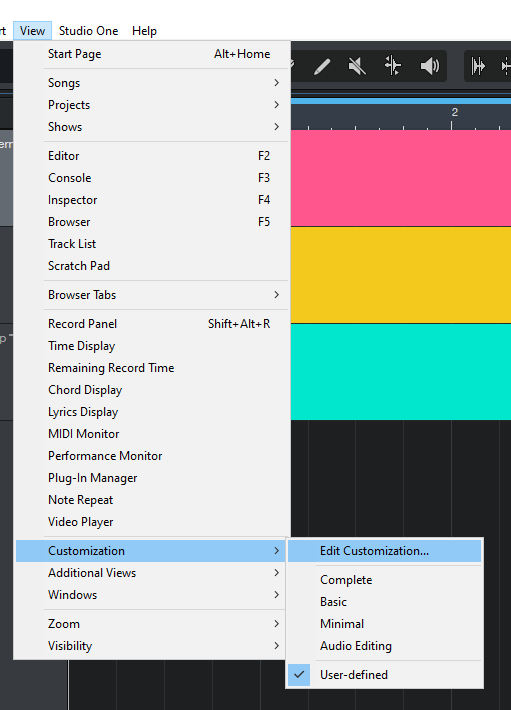
2. On the top menu bar click on: View -> Customization -> Edit Customization:
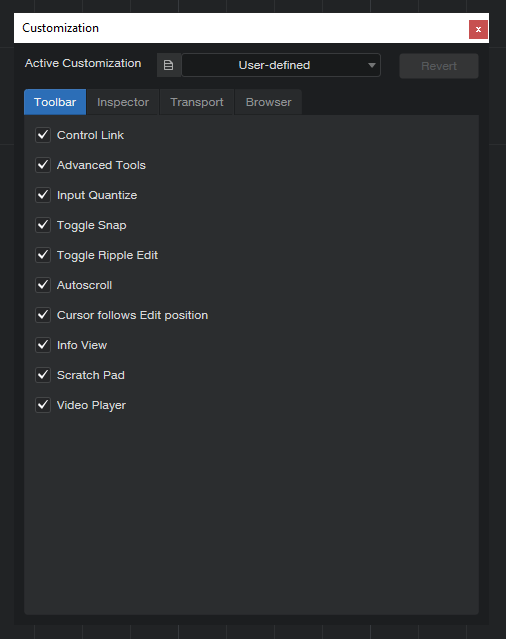
Our Customization window will open as:
It is easy to see how the window shows four tabs for Toolbar, Inspector, Transport and Browser.
Let’s say you want to customize your Transport bar!
3. Click on the “Transport” tab:
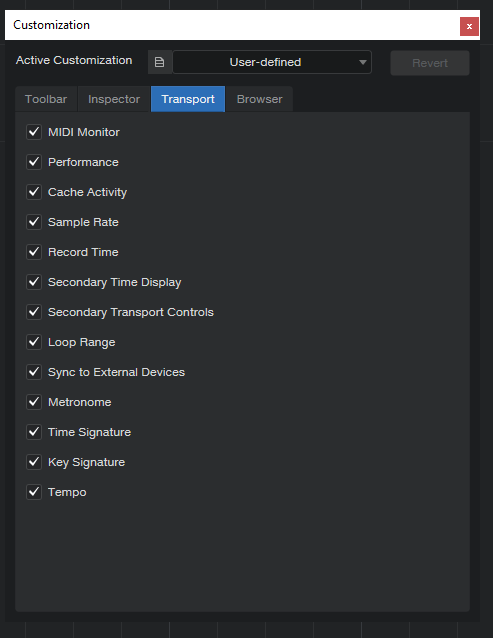
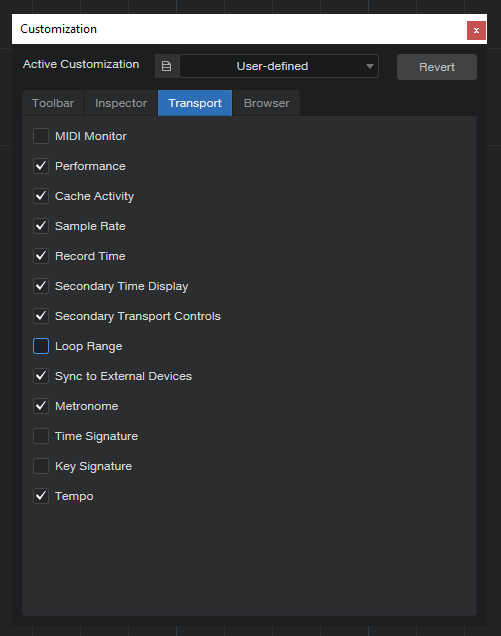
Transport customization options will show as:
Let’s say you do not work with MIDI and don’t really care about looking at the MIDI monitor, the time signature, key signature or loop ranges to be shown.
4. Click on MIDI monitor, time signature, key signature, loop ranges in order to hide this:
5. Close the window and look at the Transport bar:
As you can see, these functions are not showing anymore!
And that is how you use your Customization Editor in Studio One 6!
We hope you found this blog on how to use the Customization Editor in Studio One 6 helpful. Make sure to check out our website for more information on how you can learn PreSonus Studio One with OBEDIA. To start your pro audio training in PreSonus Studio One, visit the OBEDIA website.
Using PreSonus Studio One 6 software to produce music would be ideal with one of our professionally designed PCAudioLabs Systems due our high-performance specifications in order to work with any of the Digital Audio Workstations supported. If you would like to order one of our PCAudioLabs computers, please call us at 615-933-6775 or click this link for our website.

