Table of Contents
How to use Accusonus Voice Leveler
We are very happy to announce the start of this new series of tutorials on the plugins included in Accusonus‘ ERA bundle. Today we are going to demonstrate how to use and operate the Voice Leveler plugin from Accusonus.
Want to learn how to use the Accusonus’ plugins in real time, with a professional digital audio trainer? It’s faster than blogs, videos, or tutorials. Call OBEDIA for one on one training for Accusonus software. Mention this blog to get 15 bonus minutes with your signup! Call 615-933-6775 and dial 1, or visit our website to get started.
Need a Pro Audio laptop or Desktop PC to run Accusonus software and all of its features at its best?
Check out our pro audio PCs at PCAudioLabs.
To get the Accusonus ERA 5 Bundle with this plugin, please click here to visit the Accusonus website.
Getting started with How to use Accusonus Voice Leveler
The ERA plugin bundle by Accusonus brings you a group of plugin tools that let you quickly repair audio under an easy-to-use graphic user interface.
Today we are going to be working with another plugin included in this bundle, called “Voice Leveler”.
For the purpose of this tutorial we will be working in Ableton Live as the host application.
-
Open a Live Set that contains at least one audio track with noise that you wish to repair:
2. From the plugins list, look for Accusonus -> Voice Leveler:
3. Add Voice Leveler to your audio track:
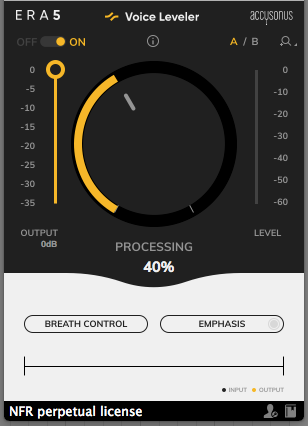
4. Let’s now focus on the controls offered by the plugin:
At first, it is easy to see how most of the plugins included in the ERA’s bundle are very simple to use since they are designed under a single-knob operation philosophy.
In the case of the Voice Leveler, this plugin can balance the level of your audio signal, especially vocals. It can be used on vocals for music purposes or voice-over work.
The specific parameters are:
- A/B Switch: This switch lets you toggle between configuration A and configuration B to easily test and A/B their differences.
- ON/OFF Switch: This switch lets you toggle the plugin ON/OFF. When it is set to OFF, the plugin is completely bypassed.
- Output gain: This slider controls the gain applied to the output of the processor.
- Processing: This knob controls the amount of processing applied by the plugin.
- Breath Control: When this switch is ON, the breaths will not processed (leveled).
- Emphasis: When this switch is ON, it will apply a smooth tonal balance of extra presence and liveliness to the sound, only if it detects it’s needed.
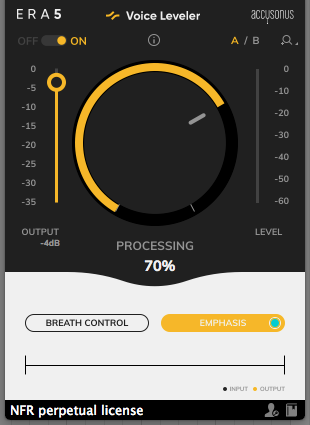
For the purpose of this tutorial we will use the plugin to control the level of the vocals and not affect the breaths. The parameters will be:
- A/B Switch: A.
- ON/OFF Switch: ON.
- Output gain: -4 dB.
- Processing: 70%
- Breath Control: OFF
- Emphasis: ON.
5. Apply the previous configurations and the plugin will look like this:
After we playback the track, the voice definitively was leveled in a smooth and natural way!
At this point we have successfully demonstrated How to use Accusonus Voice Leveler.
Using Accusonus software to produce music would be ideal with one of our professionally designed PCAudioLabs Systems due our high-performance specifications in order to work with any of the Digital Audio Workstations supported. If you would like to order one of our PCAudioLabs computers, please call us at 615-933-6775 or click this link for our website.


