This tutorial shows the user how to use the Ableton Live GATE audio effect.
Need a Pro Audio laptop to run Ableton Live software and all of its features at its best? Check out the MC Mobile line of Pro Audio Laptops from PCAudioLabs.
On the modern days of audio mixing, the digital tools that engineers use in order to shape the recorded sound are called Plugins. Plugins can emulate the behavior of vintage analog pieces of gear, or simply act as clean/linear digital signal processors, performing tasks such as equalization, compression, limiting, expansion, gating, time-domain effects, etc. Ableton Live comes with a variety of proprietary plugins (effects) that can help the user mix a music production completely “in-the-box”.
One of the most used inserts that come with Ableton Live is the Gate, which can be defined as a device that affects the dynamic range of a signal by bringing down the level of the signals below a certain threshold, making the loud and quiet parts farther away in level, ultimately yielding volume differences that are more obvious.
For the purpose of this tutorial, we will explain how to use the Gate audio effect in Ableton Live 10:
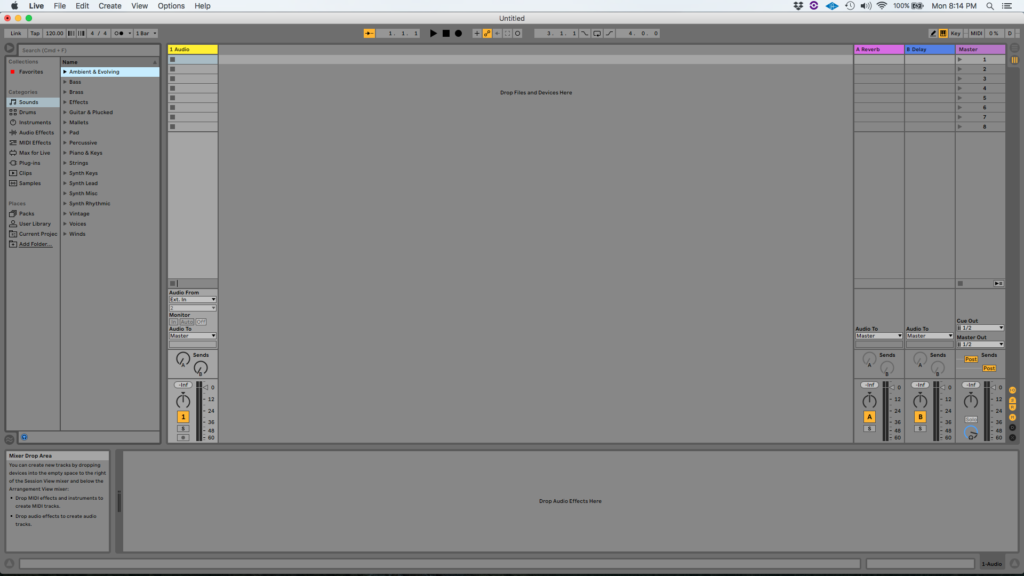
- Create a Live Set with at least one audio track. Make sure the audio track has at least one audio clip assigned to it.
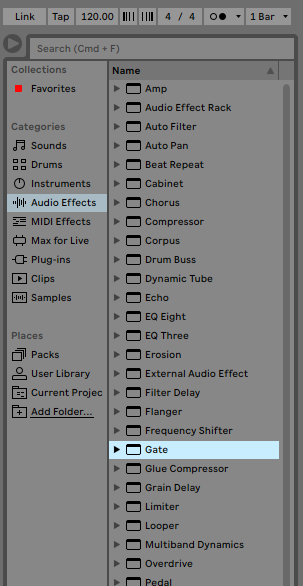
2. From the Browser, search for Audio Effects -> Gate:
3. Drag and Drop the Gate audio effect on top of the audio track labeled as “1 Audio”.
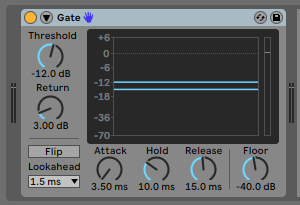
As soon as this effect has been dropped on top of the track, it is easy to see how the Gate audio effect now appears on the device view of the track.
It is easy to see from the previous picture, the Gate audio effect has several parameters that can be explained as:
- Threshold: This knob sets the threshold levels that incoming signals must exceed in order to open the gate.
- Return: This knob sets the difference between the threshold level that opens the gate and the level that closes it.
- Flip: When this is ON, the Gate behavior is inverted. Signals will only pass if the level is below the threshold.
- Lookahead: This sets the amount of time that the input signal will be delayed.
- Attack: This knob sets how long it will take for the gate to open after the threshold is reached.
- Hold: This knob sets the minimum time that the gate will remain open after the signal exceeds the threshold.
- Release: This knob sets how long it will take for the gate to close after the level has dropped below the threshold.
- Floor: This knob sets the amount of attenuation when the gate is closed.
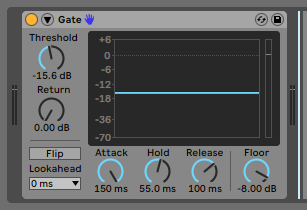
For the purpose of this tutorial, we will use the Gate to reduce in a very subtle way the soft parts of the track. The Gate audio effect should be set as:
- Threshold: -15.6 dB.
- Return: 0 dB.
- Flip: OFF.
- Lookahead: 0 ms.
- Attack: 150 ms.
- Hold: 55 ms.
- Release: 100 ms.
- Floor: -8 dB.
4. Apply the previous configuration, and the Gate audio effect should look like this:
At this point we have successfully explained how to use and configure the Gate audio effect in Ableton Live 10. The tutorial has now finished.
Using Ableton Live 10 software to produce music would be ideal with one of our professionally designed PCAudioLabs Systems due our high-performance specifications in order to work with any of the Digital Audio Workstations supported. If you would like to order one of our PCAudioLabs computers, please call us at 615-933-6775 or click this link for our website.


