Table of Contents
Output Configuration for Live Performance in Ableton
This blog is part of our new series of tutorials based on the functions and features included in Ableton for Live Performance using background tracks.
Want to learn how to use Ableton Live in real time, with a professional digital audio trainer? It’s faster than blogs, videos, or tutorials. Call OBEDIA for one on one training for Ableton Live and all digital audio hardware and software. Mention this blog to get 15 bonus minutes with your signup! Call 615-933-6775 and dial 1, or visit our website to get started.
Need a Pro Audio laptop or Desktop PC to run Ableton Live software and all of its features at its best?
Check out our pro audio PCs at PCAudioLabs.
Output Configuration for Live Performance in Ableton
If you are performing live with a band, or as a solo artist, chances are you will have some background tracks supporting your show.
You will have some kind of computer, perhaps a laptop, and an interface.
Ideally, the interface will have multiple outputs, so that you can route tracks out of the software, into the “analog” realm, individually.
This will help your live sound engineer because it would give them the ability to mix these tracks as needed.
Having independent outputs for your tracks will also help your monitor engineer in making individual mixes for each of the musicians.
But, we need to make sure we are setting up our Analog Outputs in Ableton correctly for this task.
We must enable all outputs in both stereo and mono options in order to be able to use them properly.
How can we do this?
Let’s give it a shot!
-
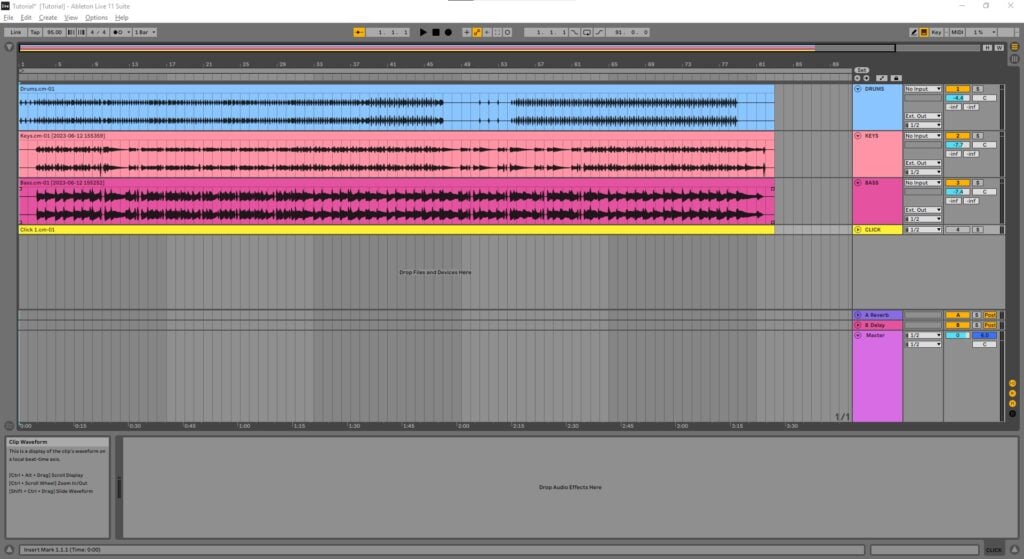
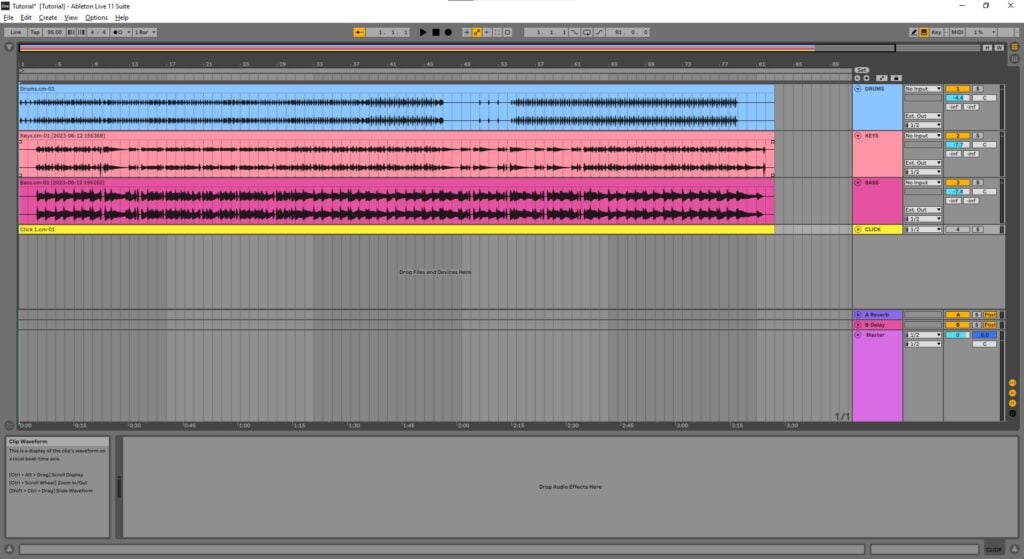
Open your Ableton Live set:
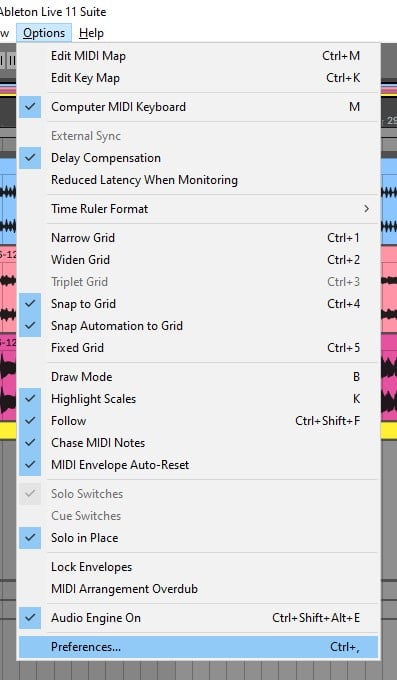
2. On the top menu bar click on: Options -> Preferences:
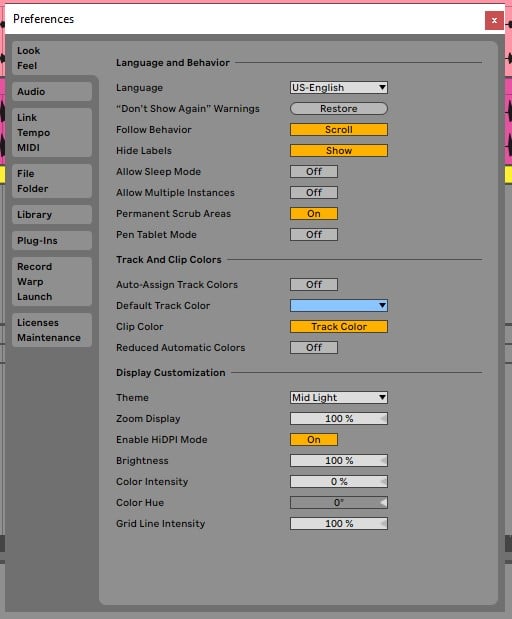
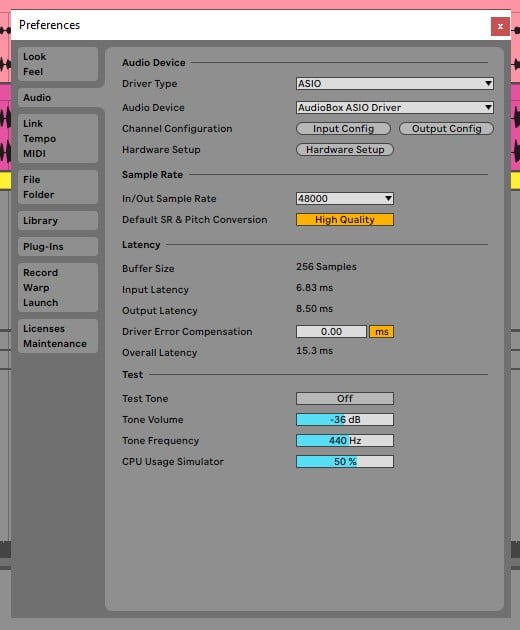
The Preferences window will open as:
3. Click on the “Audio” tab on the left:
4. Click on “Output Config”:
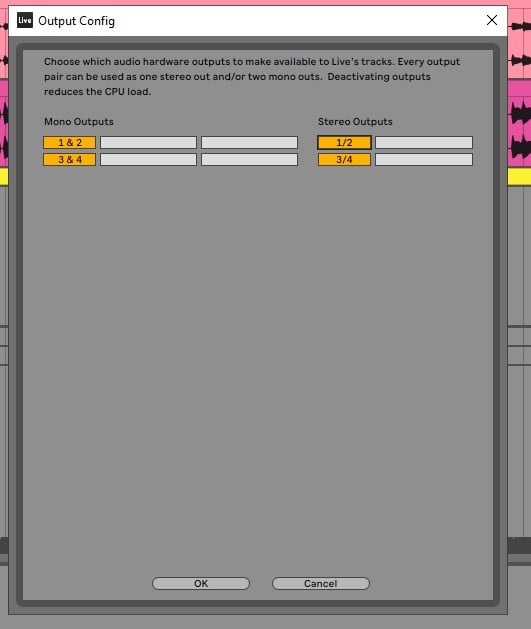
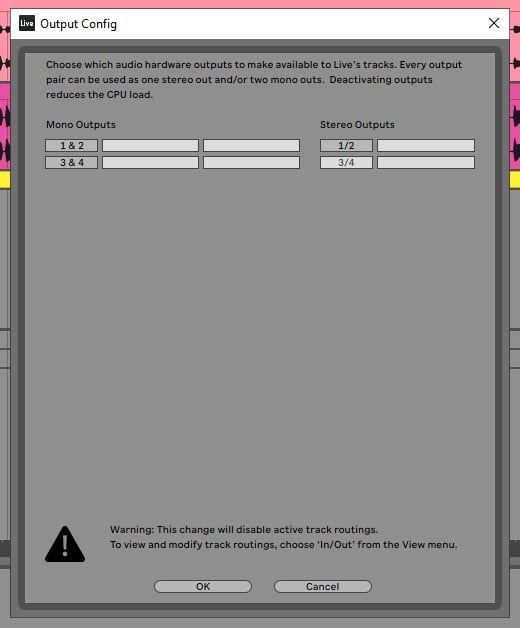
The window will open as:
So this is the Output Configuration window.
This is CRUCIAL!
On the left, we can see the outputs shown as mono outputs, meaning they are individual analog outputs.
In the case of our interface, we have 4 outputs, so we can have 4 mono analog outputs connected.
On the right, we can see the inputs shown as stereo outputs, meaning they are stereo pairs of analog outputs.
In the case of our interface, we have 4 outputs, so we can have 2 stereo analog outputs connected.
We can also see, they all appear to be greyed out, meaning they are disabled!
We just want to enable all of them, both in mono and stereo options.
5. Click on all the outputs to enable them:
Outputs will light up in yellow indicating they are now enabled.
6. Press “OK” to apply changes:
And the software will take us back to our original window.
Now, we can route all of our tracks however we want!
And that is it! Now you know how to set your Output Configuration for Live Performance in Ableton.
Using Ableton Live software to produce music would be ideal with one of our professionally designed PCAudioLabs Systems due our high-performance specifications in order to work with any of the Digital Audio Workstations supported. If you would like to order one of our PCAudioLabs computers, please call us at 615-933-6775 or click this link for our website.

