Table of Contents
Tempo Map in Pro Tools
This blog is part of our new series of tutorials based on Avid’s flagship Digital Audio Workstation, Pro Tools.
Want to learn how to use Avid Pro Tools in real time, with a professional digital audio trainer? It’s faster than blogs, videos, or tutorials. Call OBEDIA for one on one training for Avid Pro Tools and all digital audio hardware and software. Mention this blog to get 15 bonus minutes with your signup! Call 615-933-6775 and dial 1, or visit our website to get started.
Need a Pro Audio laptop or Desktop PC to run Avid Pro Tools software and all of its features at its best?
Check out our pro audio PCs at PCAudioLabs.
Getting started with the Tempo Map in Pro Tools
Pro Tools is a software that lets you produce, record, edit and mix audio as well as MIDI performances.
If you are producing music in Pro Tools, you will benefit from recording following a tempo map, specially if there are tempo changes within the song.
These tempo changes should be programmed before you actually start recording, so that all musicians follow the same tempo reference.
Pro Tools lets you program these tempo changes by using the Tempo Map.
On this tutorial, we will explore an overview the Tempo Map in Pro Tools:
-
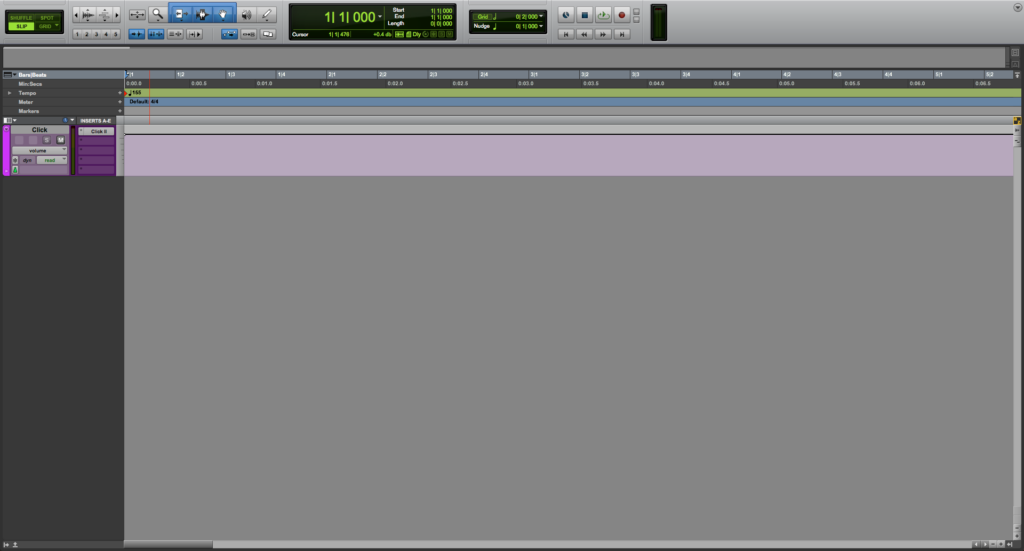
Create or open an existing Pro Tools session with at least a Click track:
2. Locate the tempo ruler area:
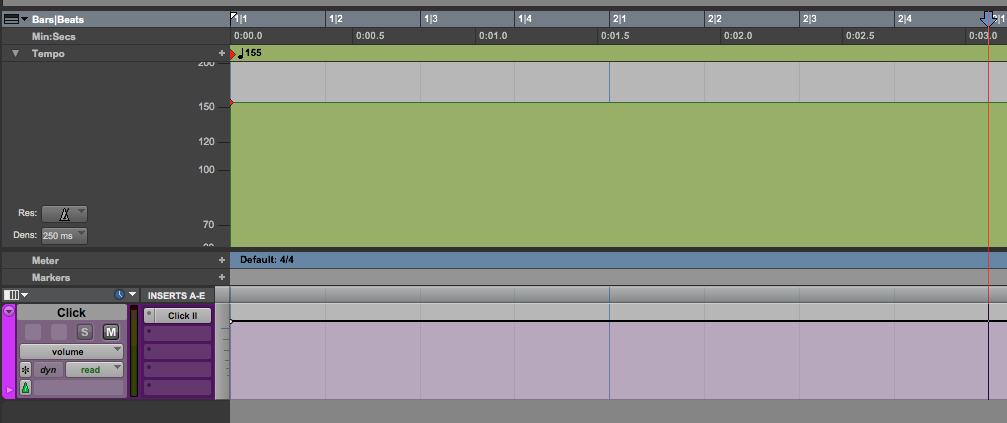
3. Click on the drop-down arrow to open the tempo map:
The tempo map will open as:
It can be seen from the tempo map, our tempo has been set fixed to 155 bpm.
If you want to add a tempo change, locate your cursor (on grid mode) at the desired location.
For the purpose of this turorial we will set our tempo change at the start of measure #3
4. Locate the cursor at the start of measure #3:
5. Click on the “+” sign to the right of the word “tempo” to add a tempo change:
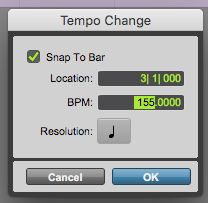
The tempo change window will appear as:
This window has some parameters that can be defined as:
- Snap to bar: When this is checked, the tempo change will happen on the start of the bar.
- Location: This determines the location of the tempo change
- BPM: This determines the BPM of the new tempo
- Resolution: This determines the resolution of the new tempo as a note value.
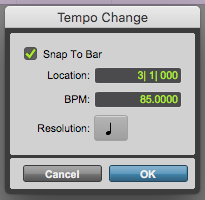
For the purpose of this tutorial we will se the new tempo to 85 BPM as:
- Snap to bar: Checked.
- Location: 3|1|000
- BPM: 85.
- Resolution: Quarter note.
6. Apply these parameters and press “OK”:
Once we press OK, the window will close and the tempo map will look like this:
It is easy to see how the tempo map shows the tempo change in a graphic way.
However, you can press play and the click will adapt accordingly. The sonic differences will be obvious when the song changes from 155 to 85 bpm.
7. Repeat the process as many times as needed for other tempo changes:
And that is it!
We have successfully programmed the Tempo Map in Pro Tools.
Using Avid Pro Tools software to produce music would be ideal with one of our professionally designed PCAudioLabs Systems due our high-performance specifications in order to work with any of the Digital Audio Workstations supported. If you would like to order one of our PCAudioLabs computers, please call us at 615-933-6775 or click this link for our website.


