The following tutorial shows the user an overview of how to A/B tracks in Studio One 4.
Need a Pro Audio laptop to run Presonus Studio One 4 software and all of its features at its best? Check out the MC Mobile line of Pro Audio Laptops from PCAudioLabs.
There are situations during the mixing stage of a production in which the audio engineer might need to toggle between different tracks in order to listen to them individually and compare which option sounds better. This situation typically happens when recording electric guitars with different microphones, making the engineer decide which one sounds “better” in order to use that option. This can also happen, during the mastering stage of a production, when the engineer toggles between tracks in order to make sure they all have the same perceived loudness. The process of “toggling” between tracks is what we call “A/B” because it resembles the idea of having an “Option A” and “Option B” which we ultimately need to pick the best.
This tutorial will present a step-by-step overview of how to A/B tracks in Studio One 4:
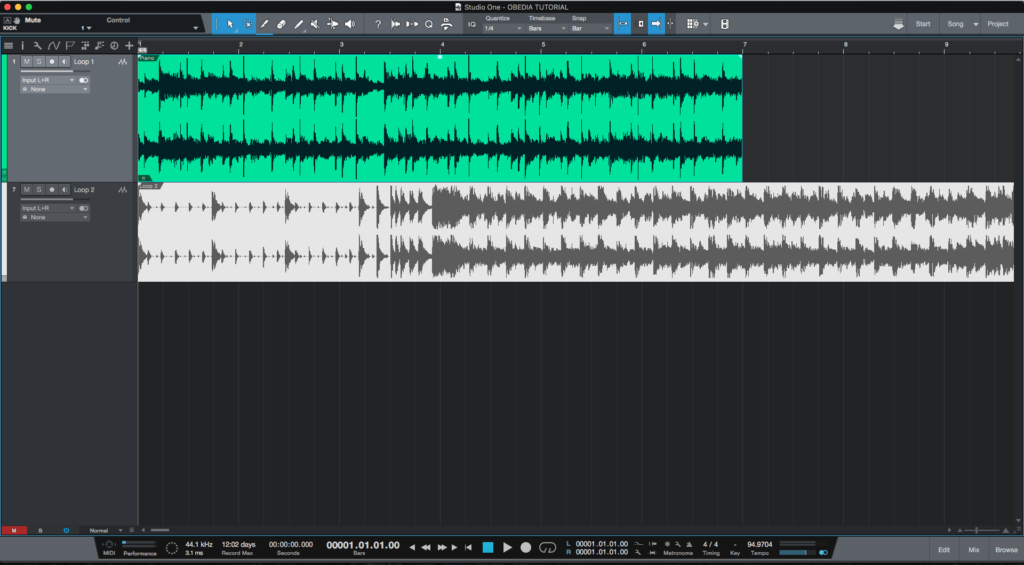
- Open a Studio One 4 song with several tracks:

If the user presses the play button, both tracks will playback their audio material. Supposing the user only wants to listen to one track, it can simply be solo’ed to make this possible. However, the problem arrives when the user wants to listen to the other track only, leaving the first un-solo’ed. This process can be achieved applying two steps:
- Soloing the second track.
- Un-soloing the first track.
Obviously, this represents two steps because we have 2 tracks. However, Studio One 4 gives their users the possibility of making this with a single click.
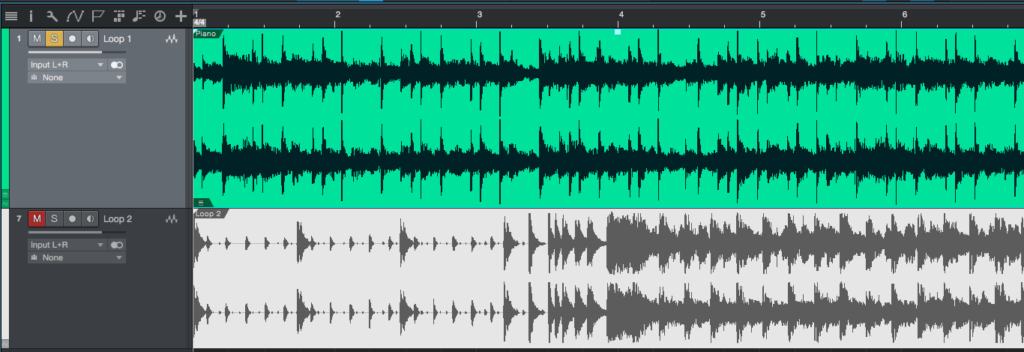
2. Solo the first track by clicking the solo button:
It is easy to see, as soon as a track is solo’ed, the other tracks are automatically muted.
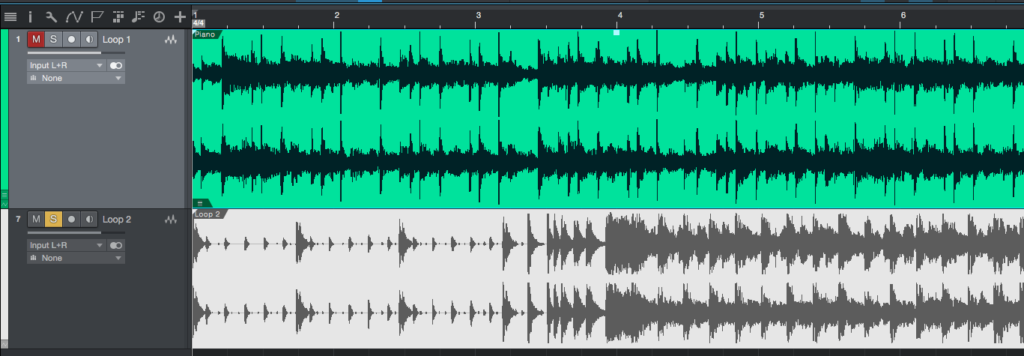
3. In order to “A/B” tracks in Studio One, hold the option key and click the solo button of the other track:
It is easy to see how the second track has been solo’ed while the first tracks has been un-solo’ed and also muted, all done in a single click. From a mixing standpoint, this process is crucial and extremely helpful for the engineer, specially when dealing with large amounts of tracks.
At this point we have successfully explained how to A/B tracks in studio One 4. The tutorial has now finished.
Using Presonus Studio One 4 software to produce music would be ideal with one of our professionally designed PCAudioLabs Systems due our high-performance specifications in order to work with any of the Digital Audio Workstations supported. If you would like to order one of our PCAudioLabs computers, please call us at 615-933-6775 or click this link for our website.


