This tutorial shows the user how to use the Ableton Live CHANNEL EQ audio effect.
Need a Pro Audio laptop to run Ableton Live software and all of its features at its best? Check out the MC Mobile line of Pro Audio Laptops from PCAudioLabs.
On the modern days of audio mixing, the digital tools that engineers use in order to shape the recorded sound are called Plugins. Plugins can emulate the behavior of vintage analog pieces of gear, or simply act as clean/linear digital signal processors, performing tasks such as equalization, compression, limiting, expansion, gating, time-domain effects, etc. Ableton Live comes with a variety of proprietary plugins (effects) that can help the user mix a music production completely “in-the-box”.
One of the most used inserts that come with Ableton Live is the CHANNEL EQ, which can be defined as a device that resembles the flexible 3-band equalizer found on most classic mixing consoles, which was fine tuned to provide musical results for a variety of audio program.
For the purpose of this tutorial, we will explain how to use the Channel EQ audio effect in Ableton Live 10:
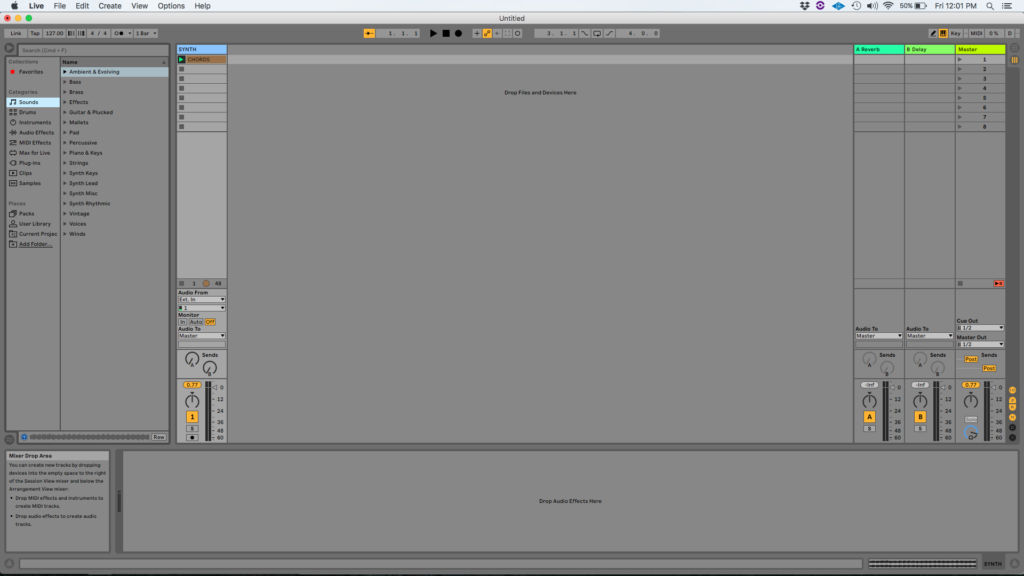
- Create a Live Set with at least one audio track. Make sure the audio track has at least one audio clip assigned to it.
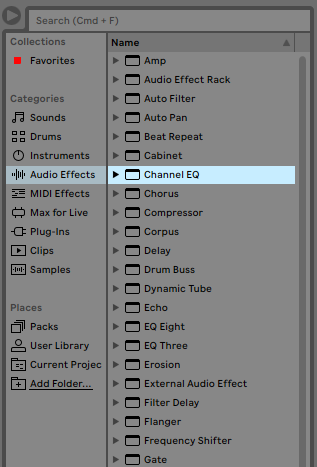
2. From the Browser, search for Audio Effects -> Channel EQ:
3. Drag and Drop the Channel EQ audio effect on top of the audio track labeled as “Synth”.
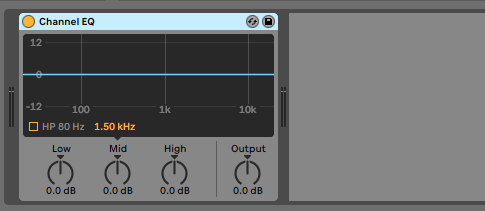
As soon as this effect has been dropped on top of the track, it is easy to see how the Channel EQ audio effect now appears on the device view of the track.
It is easy to see from the previous picture, the Channel EQ audio effect has several parameters that can be explained as:
- HP 80 Hz: This switch activates a High Pass filter at 80 Hz.
- Low: This knob controls the gain of a low shelf filter located at 100 Hz. The curve is adaptive and changes dynamically relative to the amount of gain applied.
- Mid: This knob controls the gain of a sweepable bell filter. The frequency slider located above lets the user set the frequency from 120 Hz to 7500 Hz.
- High: This knob controls the gain of a high shelf filter. When it is attenuating, the shelving filter is combined with a low-pass filter, reducing its cutoff frequency from 20 KHz to 8 KHz.
- Output: This knob controls the output gain of the device.
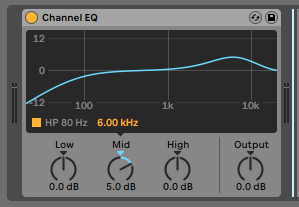
For the purpose of this tutorial, we will use the Channel EQ to remove all possible 80 Hz rumble and boost 5 dB at 6 KHz. The Channel EQ audio effect should be set as:
- HP 80 Hz: ON.
- Low: 0 dB
- Mid: 5 dB at 6 KHz.
- High: 0 dB.
- Output: T0 dB.
4. Apply the previous configuration, and the Channel EQ audio effect should look like this:
At this point we have successfully explained how to use and configure the Channel EQ audio effect in Ableton Live 10. The tutorial has now finished.
Using Ableton Live 10 software to produce music would be ideal with one of our professionally designed PCAudioLabs Systems due our high-performance specifications in order to work with any of the Digital Audio Workstations supported. If you would like to order one of our PCAudioLabs computers, please call us at 615-933-6775 or click this link for our website.


