Track Coloring in Pro Tools!
This blog is part of our new series of tutorials based on the features included in Avid Pro Tools.
Want to learn how to use Avid Pro Tools in real time, with a professional digital audio trainer? It’s faster than blogs, videos, or tutorials. Call OBEDIA for one on one training for Avid Pro Tools and all digital audio hardware and software. Mention this blog to get 15 bonus minutes with your signup! Call 615-933-6775 and dial 1, or visit our website to get started.
Need a Pro Audio laptop or Desktop PC to run Avid Pro Tools software and all of its features at its best?
Check out our pro audio PCs at PCAudioLabs.
Track Coloring in Pro Tools
Did you know you can color code tracks in Pro Tools?
Would this be helpful? Absolutely, specially when you have several tracks in a session.
Standard modern-music oriented sessions can have 100+ tracks nowadays, and honestly, it gets really hard to navigate thru the session when all tracks “look” the same.
Having different colors for different groups of instruments will help you navigate the session quicker, because you don’t necessarily need to read the names to know what you are looking for, but simply look at the color.
Track coloring will also help in the editing stage of a production.
Let’s see how it works!
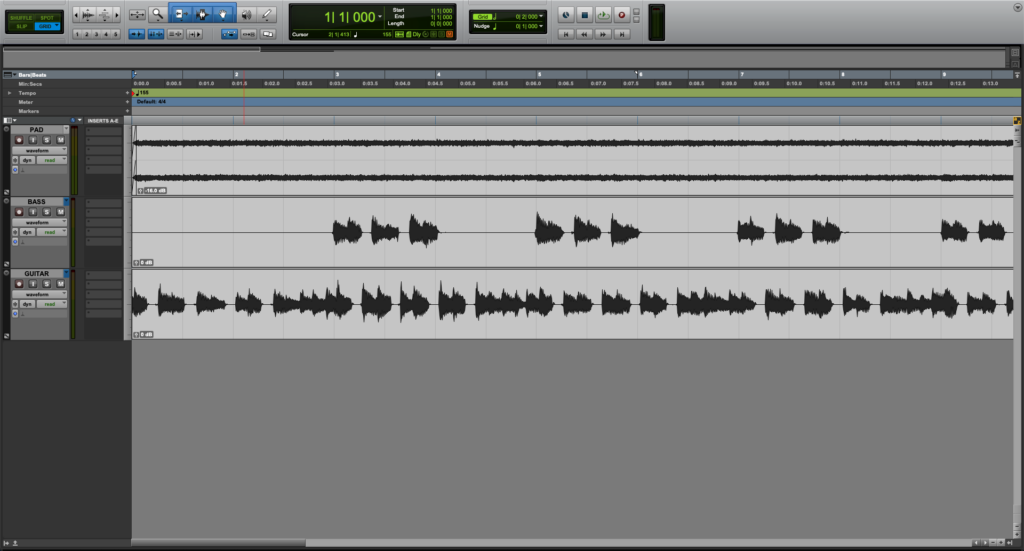
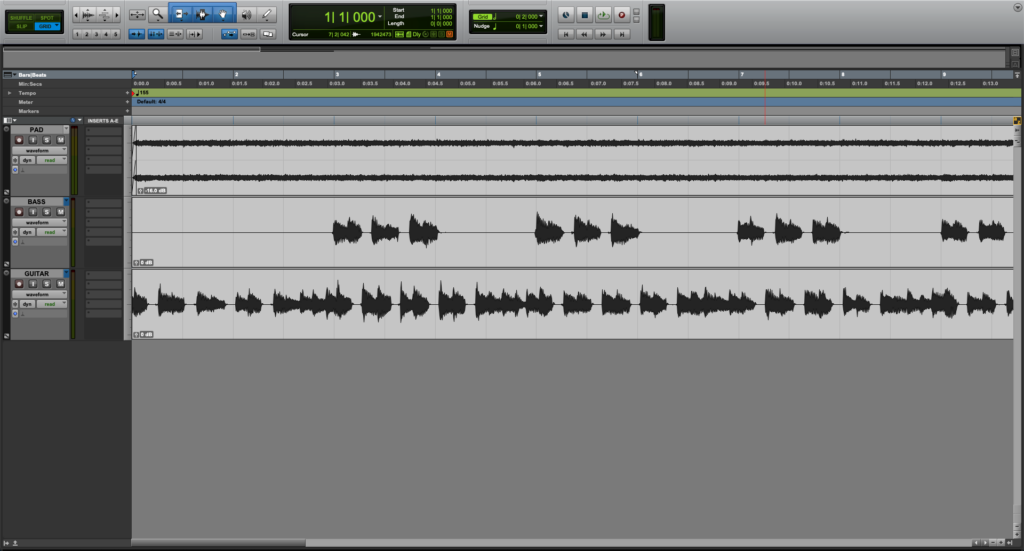
1. Open or create a new Pro Tools session:
It can be seen how all tracks appear to be black.
2. From the top menu bar click on: Pro Tools -> Preferences:
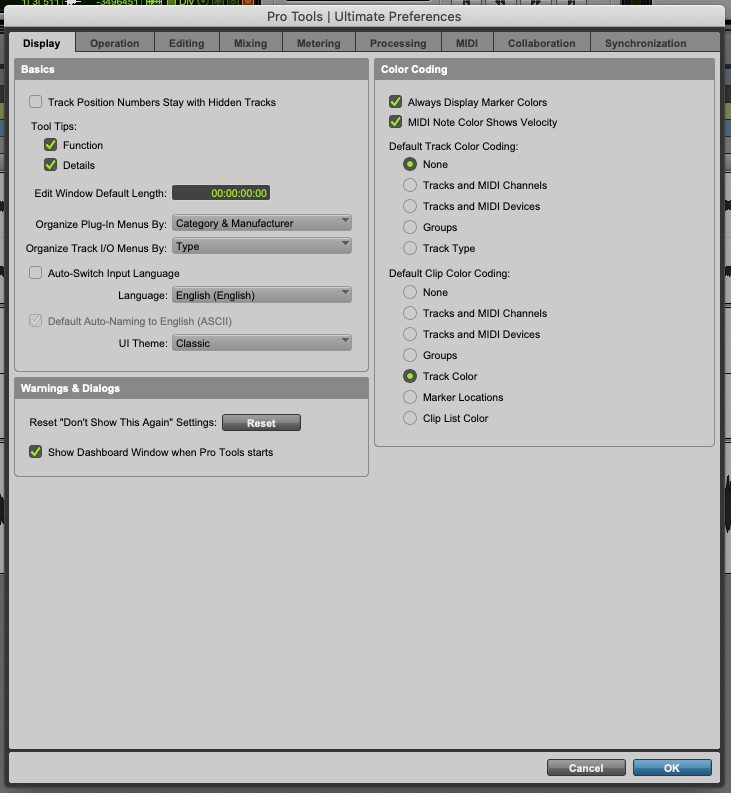
The preferences window will open as:
2. Click on the “Display” tab:
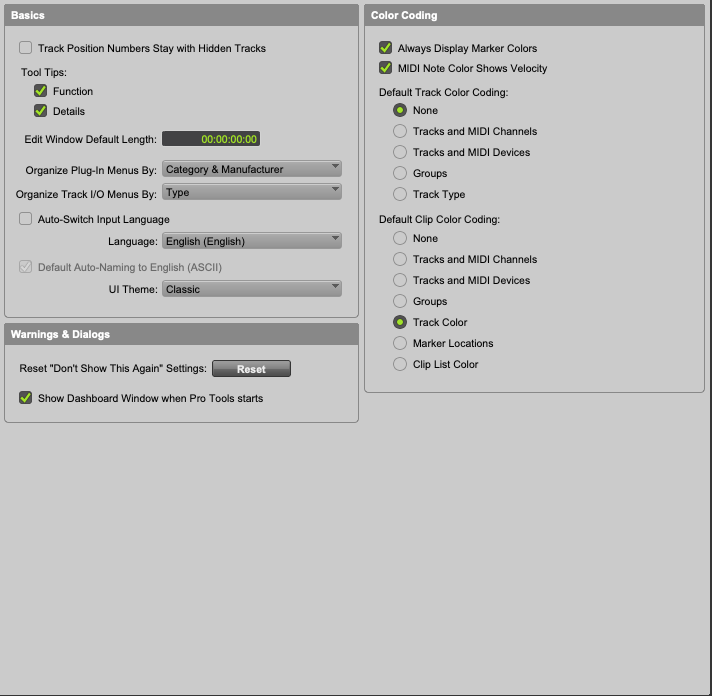
The display window will show as:
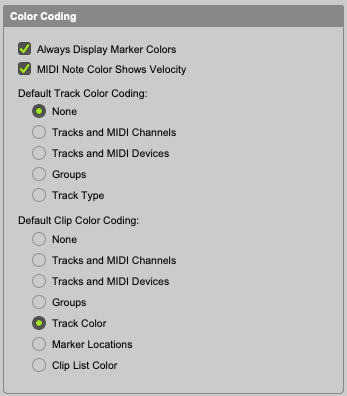
3. Locate the “Color Coding” area:
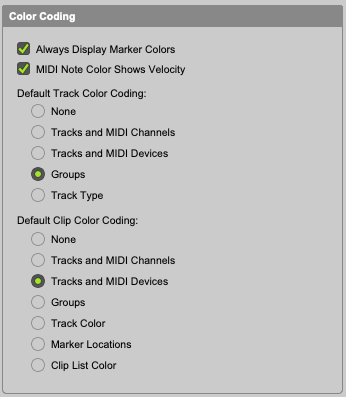
4. Select the following options:
- Default Tack Color Coding: None
- Default Clip Color Coding: Track Color
The window will look as:
5. Press “OK” to save changes:
The preferences window will close as:
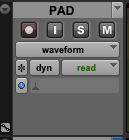
6. Locate the track name area on the Edit window:
7. Click on the black vertical bar next to the name:
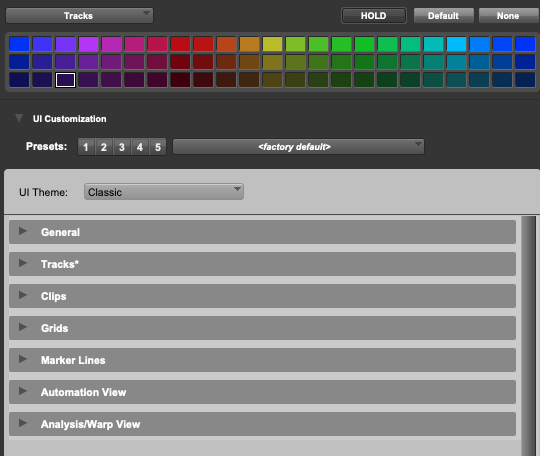
8. The Color Palette will open as:
9. Click on any of the colors and it will get highlighted as:
The track color will change accordingly as:
10. Repeat the same process for the other track as:
11. Now open the Mix Window:
12. Click on any the colored bars below the track names:
The Color Palette will open again as:
13. Click on UI Customization:
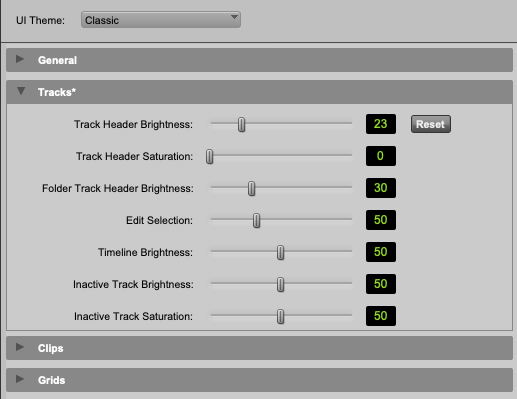
The UI Customization options will open as:
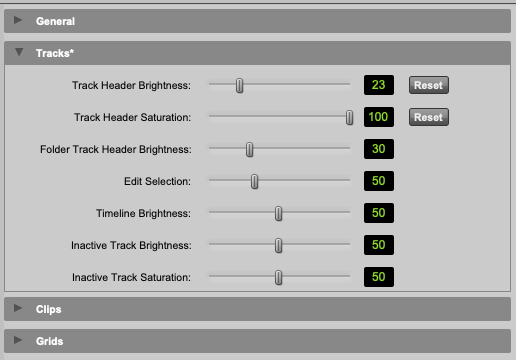
14. Click on “Tracks”:
15. Set the “Track Header Saturation” to a value of 100:
16. Close the Color Palette window and now the actual channel strips will also reflect their colors as:
And that is it!
Now you have properly color coded your tracks in Pro Tools. We hope you found this tutorial on Track Coloring in Pro Tools helpful!
Using Avid Pro Tools software to produce music would be ideal with one of our professionally designed PCAudioLabs Systems due our high-performance specifications in order to work with any of the Digital Audio Workstations supported. If you would like to order one of our PCAudioLabs computers, please call us at 615-933-6775 or click this link for our website.


