VCA Tracks in Cubase
In this blog, we’ll demonstrate how to create and configure our VCA Tracks in Cubase.
This blog is part of our new series of tutorials based on the new version of Steinberg Cubase 12.
Want to learn how to use Steinberg Cubase in real time, with a professional digital audio trainer? It’s faster than blogs, videos, or tutorials. Call OBEDIA for one on one training for Steinberg Cubase training and tech support, and get help with all digital audio hardware and software.
Mention this blog to get 15 bonus minutes with your signup! Call 615-933-6775 and dial 1, or visit our website to get started.
Need a Pro Audio laptop or Desktop PC to run Steinberg Cubase software and all of its features at its best?
Check out our pro audio PCs at PCAudioLabs.
VCA Tracks in Cubase
Let’s say you are using Cubase for mixing, and you are coming from the “analog world” of multitrack consoles.
Analog consoles let you use certain features in order to control the relative level of a group of tracks.
This was possible using VCA faders, voltage-controlled-faders.
The cool thing about these VCA faders, is that you could assign a group of tracks to a single VCA, and when you wanted to automate the level of these faders, you just had to push up, or pull down the VCA only, making the others move accordingly!
Feels like magic, and it definitively helped automating the level of your tracks to obtain better mixes!
The best part is… Cubase has abstracted this concept and added it to the software in what they call “VCA Tracks”.
Let’s talk about VCA Tracks in Cubase.
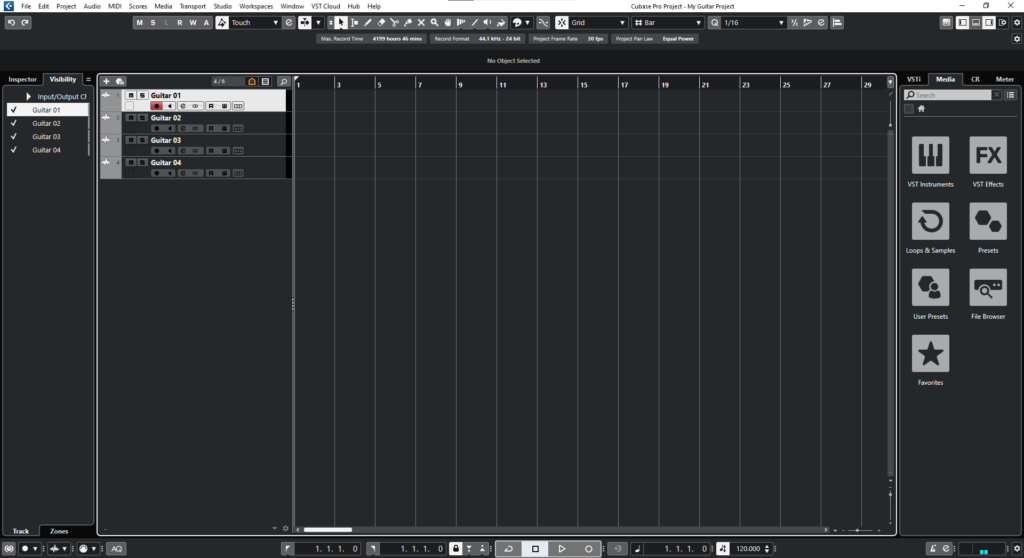
- Let’s say you have an existing project in Cubase:
It is easy to see, we have four Guitar tracks. We want to link them using a VCA Track.
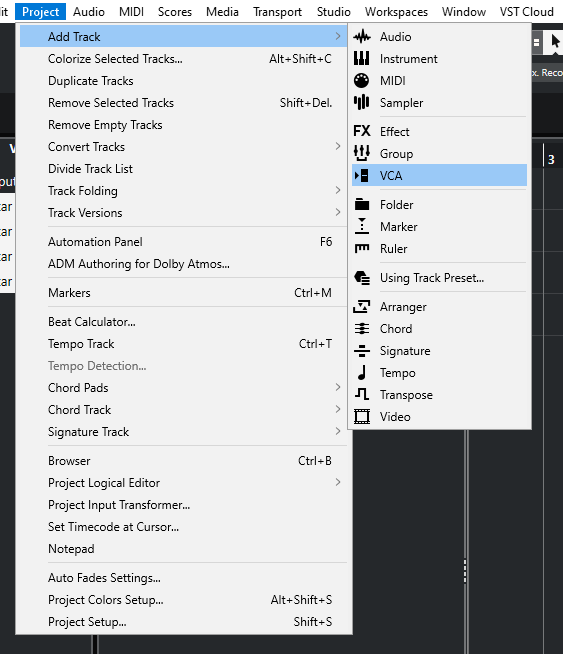
2. On the top menu bar click: Project -> Add Track -> VCA:
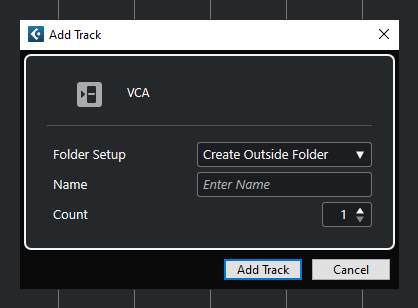
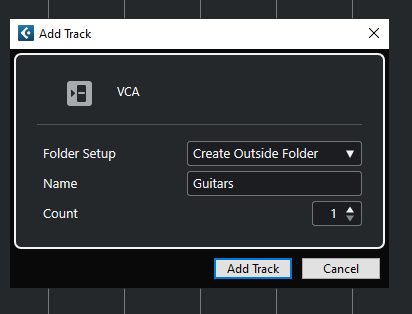
The “Add Track” window will open as:
From this window we can see there are several parameters such as:
- Folder Setup: This drop-down list lets you choose if you want the VCA track inside or outside a folder.
- Name: This field lets your type the name of the VCA track.
- Count: This option lets you determine the amount of VCA tracks to be created.
For the purpose of this tutorial, we will create a single VCA Track called “Guitars”.
3. Apply the following configurations:
4. Click on “Add Track”:
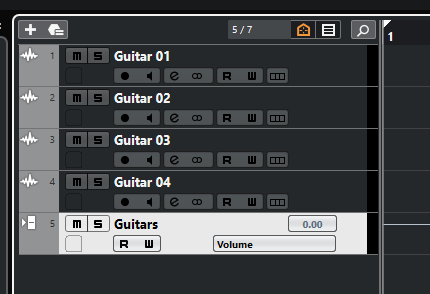
The VCA track will be created as:
Now you must link the individual guitars into the “Guitars” VCA fader.
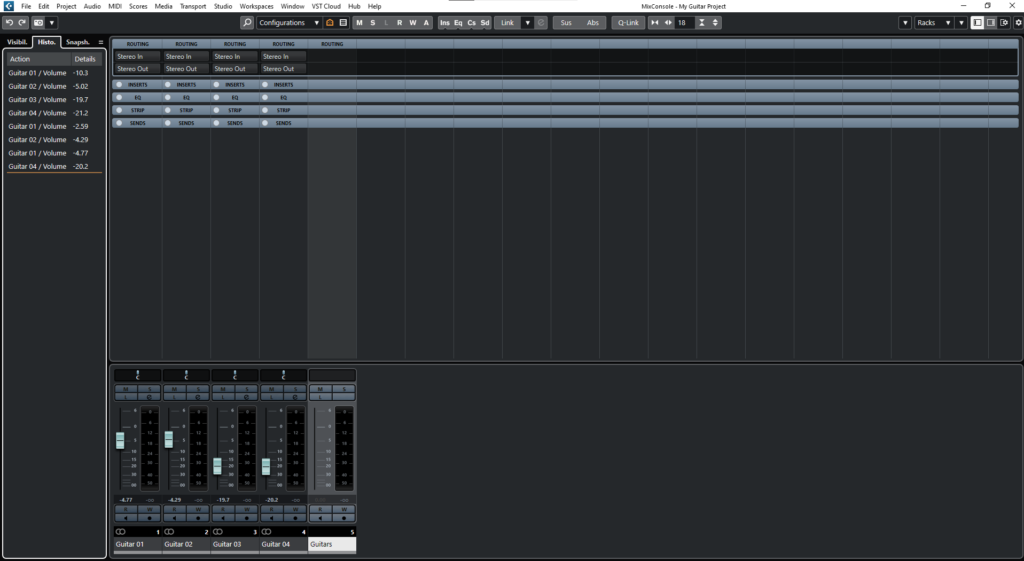
5. Press F3 to open the MixConsole window:
6. Click on the first guitar track, while holding the Shift key, and then click on the last guitar track:
This will select all guitar tracks as:
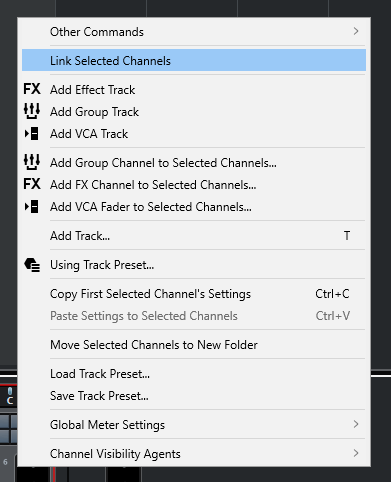
7. Right click on any of the guitar tracks and click on “Link Selected Tracks”:
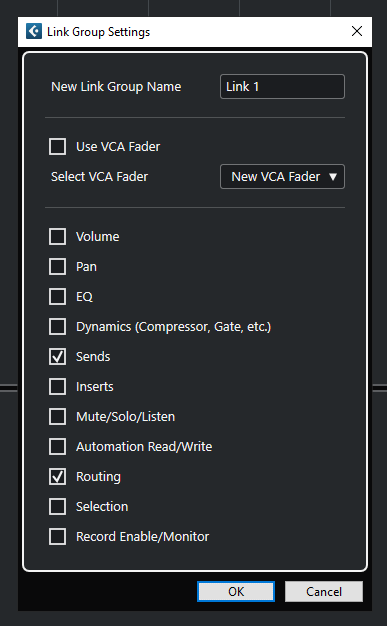
The “Link Group Settings” window will appear as:
This window has several parameters that can be configured as:
- New Link Group Name: This field lets you type the name of the link group.
- Use VCA Fader: This option lets you enable the use of a VCA Fader.
- Select VCA Fader: If the “Use VCA Fader” is enabled, this drop-down list lets you select the VCA fader.
- Options: These check/un-check options let you enable or disable different parameters to be linked such as Volume, Pan, EQ, etc.
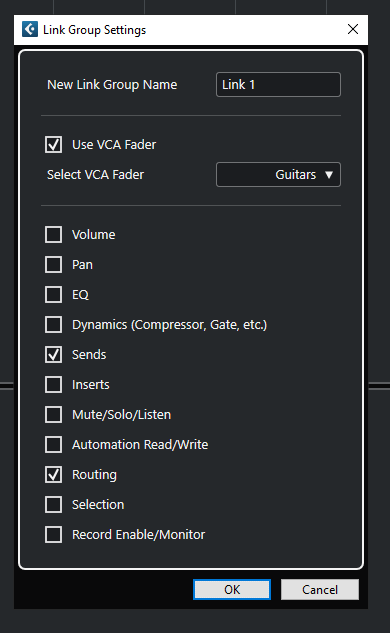
For the purpose of this tutorial we will enable the use of VCA fader and assign our “Guitars” VCA to it.
8. Apply the following configurations:
9. Press “OK”:
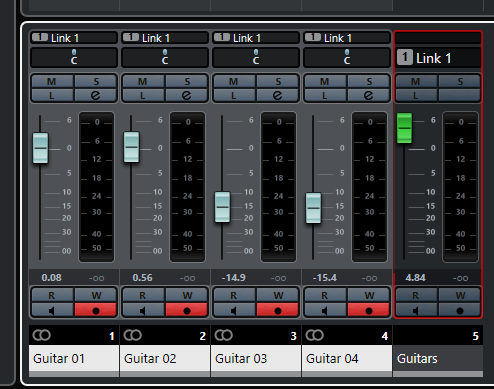
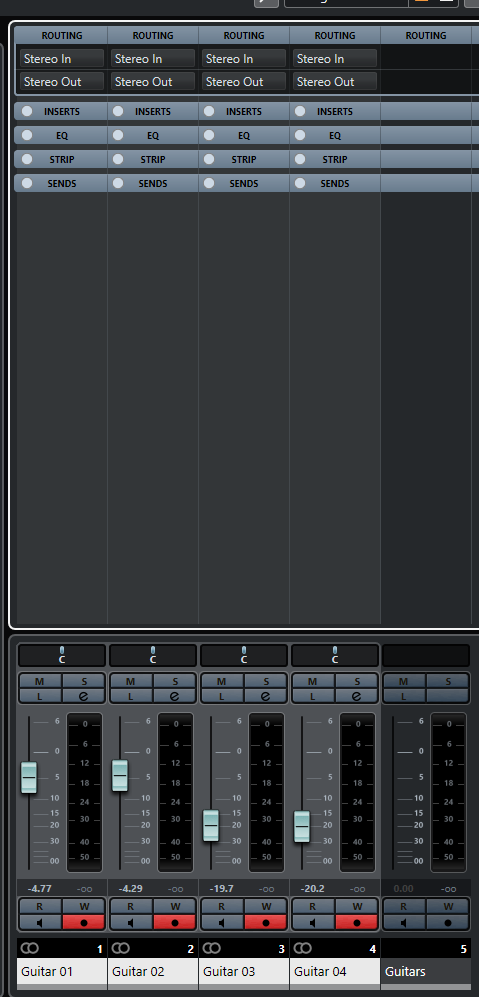
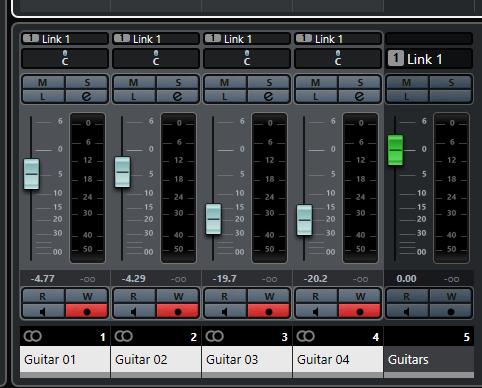
The link group will be assigned as:
Now, here comes the magic part!
If you push up the “Guitars” VCA track, they will all come up accordingly!
The same thing applies if you pull the fader down. The “Guitars” VCA fader controls the levels of the individual faders.
And that is it! Now you have created your VCA fader and assigned it to your tracks!
We hope you found this tutorial on VCA Tracks in Cubase helpful!
Using Steinberg Cubase software to produce music would be ideal with one of our professionally designed PCAudioLabs Systems due our high-performance specifications in order to work with any of the Digital Audio Workstations supported. If you would like to order one of our PCAudioLabs computers, please call us at 615-933-6775 or click this link for our website.

