The following tutorial will cover Volume Automation in Studio One 4.
Need a Pro Audio laptop to run Presonus Studio One 4 software and all of its features at its best? Check out the MC Mobile line of Pro Audio Laptops from PCAudioLabs.
Just as any other Digital Audio Workstation software, Studio One 4 gives the user the possibility of automating the volume of each track by programming the behavior of the associated fader. This is specially useful during the mixing stage of a production in which the engineer might need to modify the relative levels of each element on the mix for aesthetic purposes.
This tutorial will present a step-by-step guide on how to automate volume in Studio One 4:
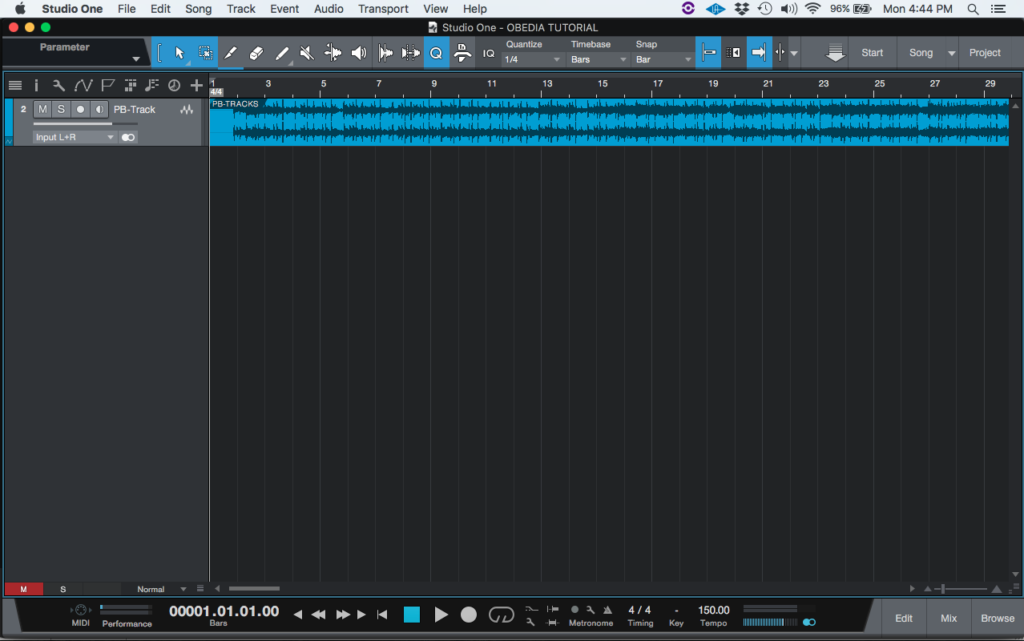
- Open a Studio One 4 song with at least one track:

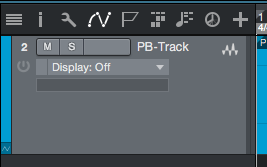
2. Locate the options on top of the track names at the left of the screen:
3. Click on the “Show Automation” button:
As soon as it is clicked, the track display will switch to the following:
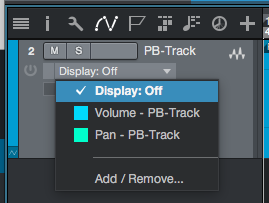
4. Click at the menu labeled “Display: OFF” and a dropdown list will appear as:
5. Click on the “Volume” option and the track will now look like this:
Note the light blue line on top of the track’s waveform. This line is the volumen automation line. The user can automate the position of the fader (volume of the track) by modifying this line as needed.
For the purpose of this tutorial, we will edit the volume automation line by using the paint tool.
6. From the top tool menu, look for the the Paint Tool:
7. Click on the paint tool and it will light as blue:
8. Using the paint tool, draw a new shape for the automation line in order to edit it:
Note how the new automation line has changed. These changes represent volume differences due the position of the fader moving up and down.
If the user presses the play button, the track will playback and the fader will move following this automation line because the automation mode is set to read, as noted on the following picture:
At this point the user has learned how to automate volume in Studio One 4. The tutorial has now ended.
Using Presonus Studio One 4 software to produce music would be ideal with one of our professionally designed PCAudioLabs Systems due our high-performance specifications in order to work with any of the Digital Audio Workstations supported. If you would like to order one of our PCAudioLabs computers, please call us at 615-933-6775 or click this link for our website.


