The following series of tutorials shows the user how to use the Project Page in Studio One. This third blog explains the timeline options included in the Project Page of Studio One.
Need a Pro Audio laptop or Desktop PC to run Presonus Studio One 4 software and all of its features at its best? Check out our pro audio PCs at PCAudioLabs.
On the modern days of audio production, mixing and mastering, engineers mostly use software tools to develop these tasks. Software companies develop programs designed for recording purposes, mixing purposes or matering purposes, and often, engineers might find themselves in situations where multiple programs are used in order to work on a musical production. Studio One is a software that gives the engineer all the tools and functions needed in order to record, mix and also master music.
On these series of tutorials we will be working with the “Project” page of Studio One Professional. The Project page is designed for the sole purpose of mastering albums, EPs and music productions in general. It gives the engineers all the metering tools needed for mastering, as well as the ability to apply inserts to the tracks, master fader, audio exporting features, DDP creation and disc burning capabilities.
On this third blog we will show the different timeline options of the Project Page.
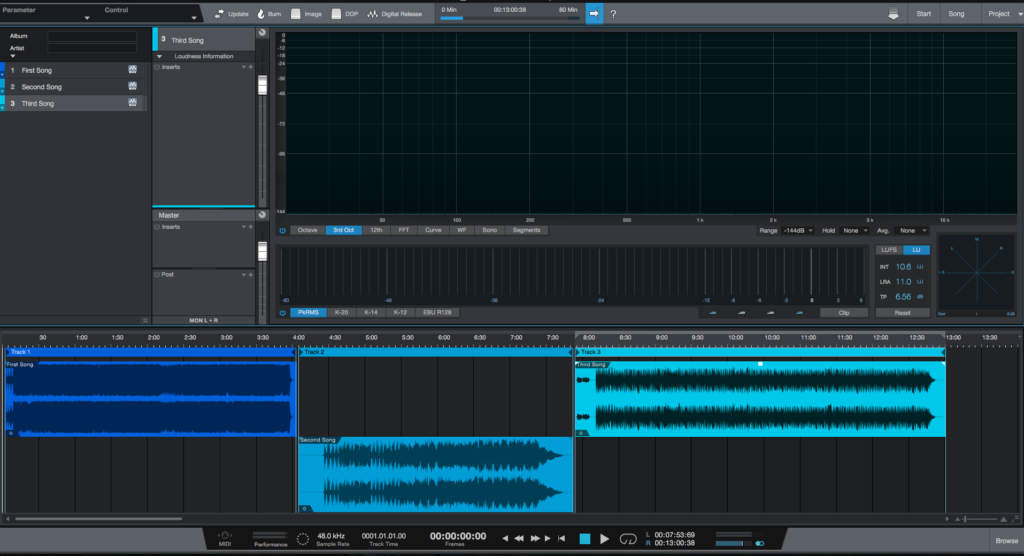
- Open a Project that contains audio information on the timeline:
2. Locate the timeline area:
On this area, the user can drag each of the mix files to the left or right of the timeline in order to make the distance (in time) between the songs shorter or longer.
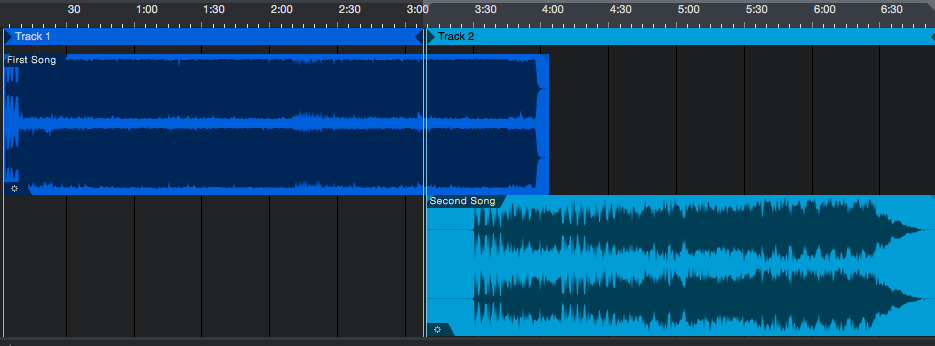
3. Click on any of the songs and drag it:
For the purpose of this tutorial the second song will be dragged to the left.
It is easy to see now, how the start of the second song happens before the first song has ended. This is a case in which a fade in and fade out would be ideal to smooth the transition.
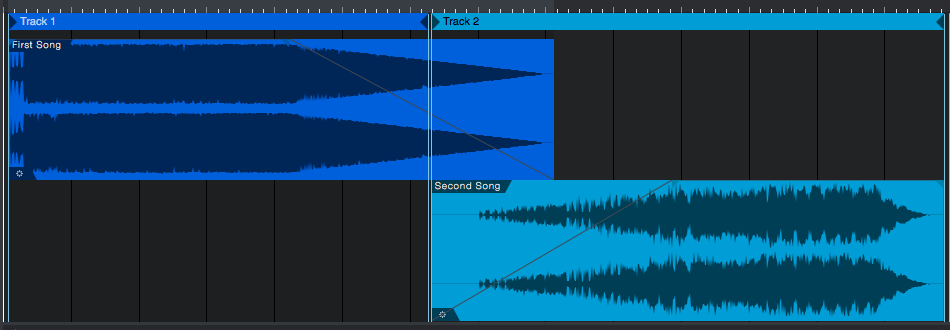
Fades are done exactly the same as in the Song page, by clicking on either ends of the audio event and dragging.
4. Create a fade out on the first song, and a fade in on the second song:
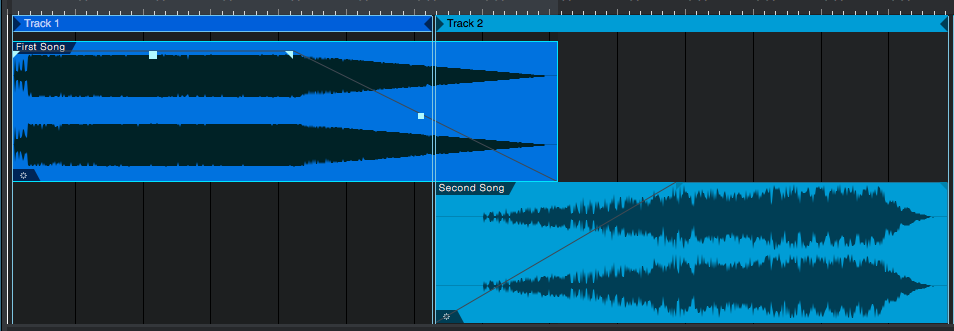
The user can also modify the overall gain of each audio event by clicking on the top center of each event and dragging up or down the gain line.
5. Click on the gain line of the first audio event and reduce the overall gain:
This gain modification of the audio event happens before any processing applied and before the gain stage of the associated fader.
At this point we have demonstrated the different timeline options included on the Project Page of Studio One.
Using Presonus Studio One 4 software to produce music would be ideal with one of our professionally designed PCAudioLabs Systems due our high-performance specifications in order to work with any of the Digital Audio Workstations supported. If you would like to order one of our PCAudioLabs computers, please call us at 615-933-6775 or click this link for our website.


